

SI Cloud Control (SICC)
This guide will show how to use the ServingIntel Cloud Control platform. Run through the steps below to get started!
Overview
ServingIntel Cloud Control is a cloud-based platform that provides a complete solution for Sales Item Management, Loyalty Management and Team Member Management.
Pre-Requisites
Before using this guide, the following should be met first:
1) Any of the following roles should be granted to the user or fulfilled first before using ServingIntel Cloud Control:
a. Store Admin
b. Store User
2) Login credentials are given.
3) The following system applications and requirements are installed:
Managed by ServingIntel Cloud Control Team
This Topic Includes:
SICC Reporting
- Dashboard Reports
- Daily Performance Report
- Transaction Detail Report
- Transaction Report
- Customer Account Statements
- Gift Card Liability Report
- Item Sales Report
- Meals Sold Report
- Tip Handling Report (Tips Report)
- Time Clock Report
- Audit Report for Cancelled Sales, Voids, Comps, Discounts
- Resident Attendance Dashboard
- Resident Attendance Report
SICC Items Management
- Add Items
- Delete Items
- Update Item Images
- Update Web Item Names
- Update Items from SICC to eCommerce
- Enable/Disable Items from SICC to Hospitality Site
- Display “Available/Not Available” Items from SICC to Hospitality Site
- Update Item Availability
- Sort Items on the eCommerce Site from SICC
- Add Inscriptions for Items
- Update Item Attributes
- Set Up Item Scheduling
- Enable Meal Points
Using Group Edit Functions
Meal Plan Management
- Configuring Meal Plans
- Managing Meal Plans
- Configuring Meal Types
- Sorting Meal Types
- Meal Plan Points/Count Improvement
Site Settings Management
- Enable/Disable eCommerce
- Set Up eConnect Settings
- Set Up Order Times
- Add Item Groups
- Manage Meal Cycles
- Update Meal Cycles
- Create Meal Cycles
- Manage the Order Now Introductory Message
- Blocked Users
- Set Up Menu Names
- Add New Categories
- Delete Menu Names
- Manage eCommerce Sales Categories
- Set Up Business Hours
- Configure Settings
- Configure Devices
- Set Up a Virtual Restaurant
- Set Up Revenue Centers
- Set Up Service Profile Table Layouts
- Update Table Layouts
- Add Gift Cards
- Add Gift Card Types
- Check Security Level Settings in Discount Management and Employee Maintenance
- Enable a New Job Code
- Update POS Type on Service Profile
- Block User Sites Assignment
- Setting Up Payment Types
- Store ID Integration
- Merging User Logins & Employee
- Security Levels for 360
- 360 Devices and Printer Settings
- Delivery Zone Set Up
- Discount Management
- Add Order Type
- New Company Details
- Add eConnect Price
- Auto Gratuity – Additional Changes
- SI 360 Menu Controls
AI, BI, and SI Integration
Add Items
Managed by ServingIntel Cloud Control Team
#strategic
Date Published: September 11, 2020
Date Updated: August 11, 2025
Version: 2025.3.1
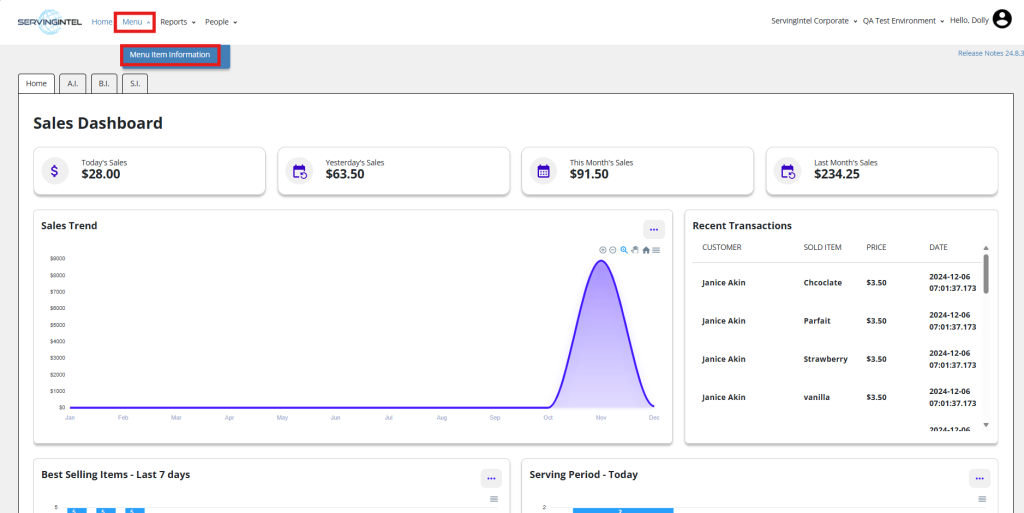
1. Go to Menu > Menu Item Information.
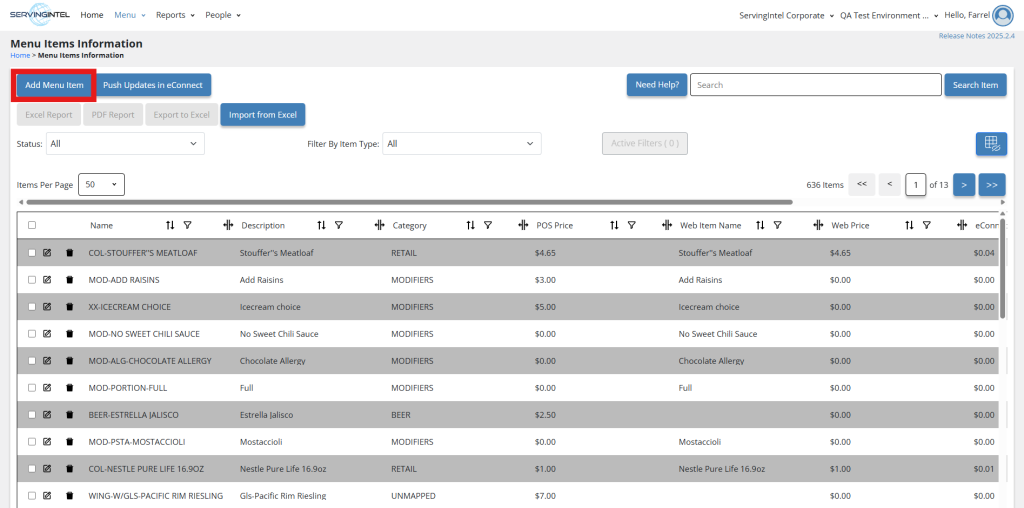
2. Within the “Menu Items Information” page, click on the “Add Menu Item” option.
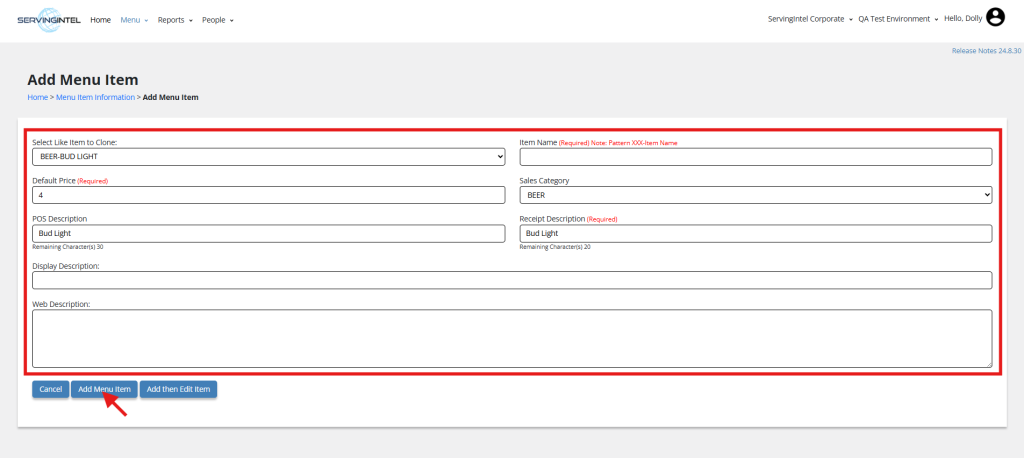
3. On the “Add Menu Item” page, choose an item to clone from the provided drop-down list.
Note:
ServingIntel Cloud Control provides a pre-populated list of template items for user convenience. Users can edit or update any items as needed.
4. Complete the following fields:
- Item Name – Enter the name of the product.
- Department – Enter the category or section the item belongs to.
- Default Price – Enter the standard price of the item
- POS Description – Enter the item description based on point of sale.
- Receipt Description – Enter how the item is listed on the receipt.
- Display Description – Enter how the item is shown on displays.
- Web Description – Enter how the item is described on the website
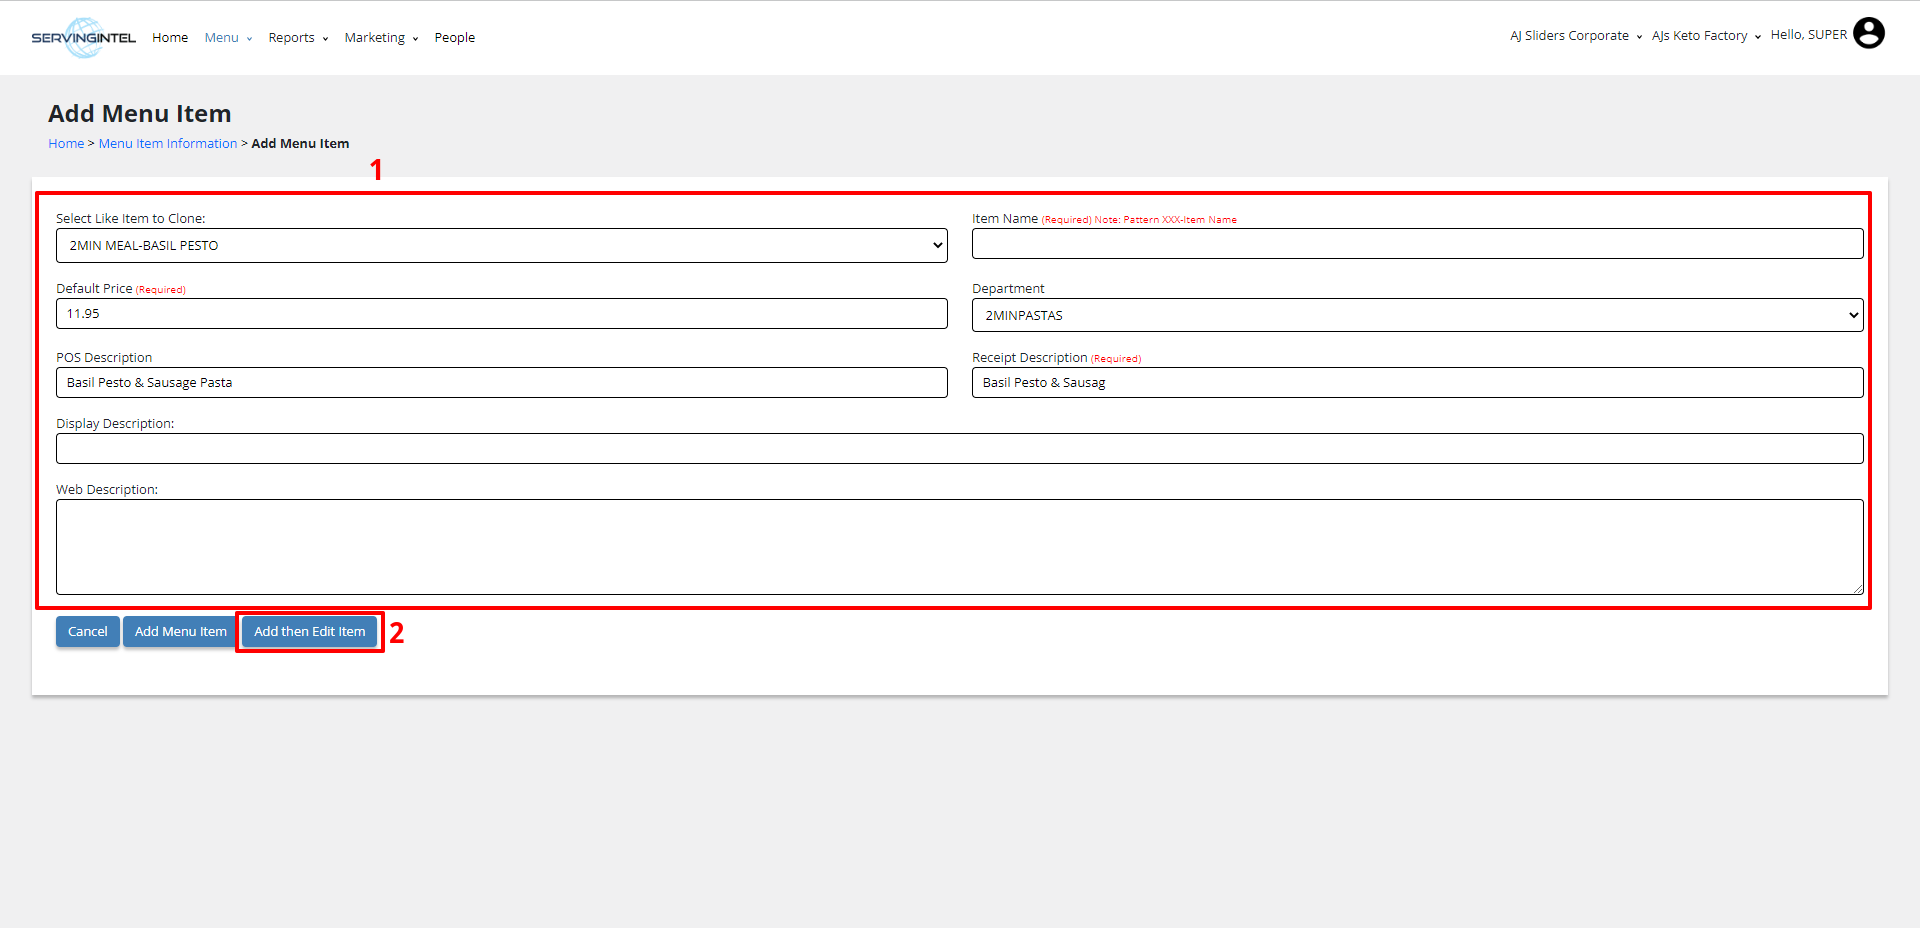
5. Once finished, click on “Add” and then proceed to “Edit Item”.
A status message will appear. Once the system has processed this, the user will be redirected to the “Update Menu Item” page for further edits.
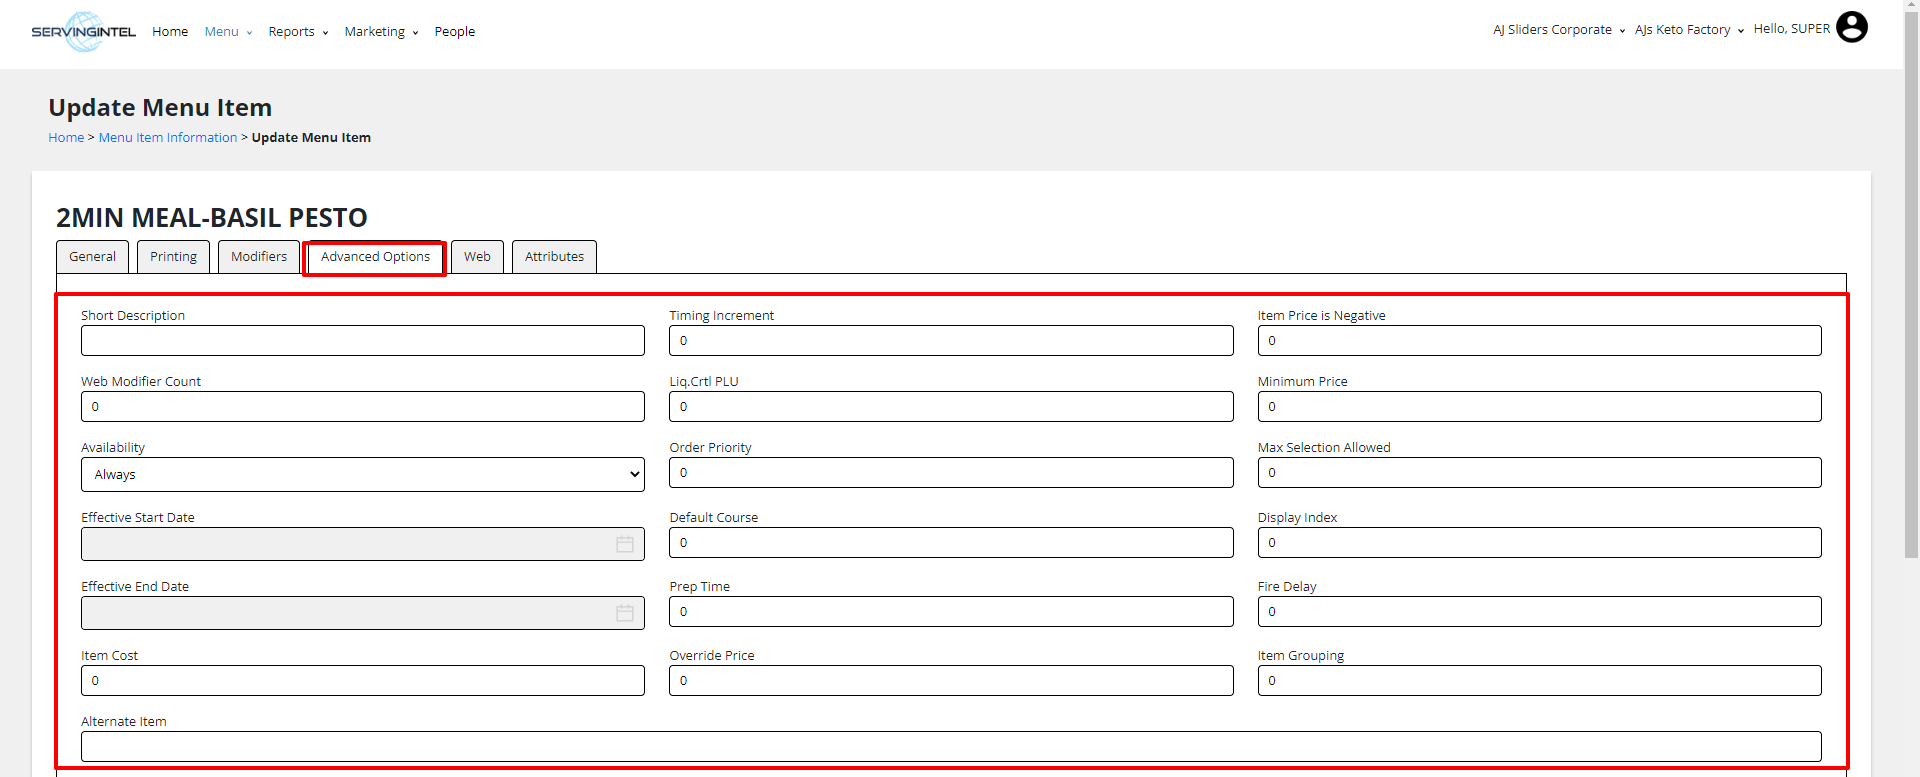
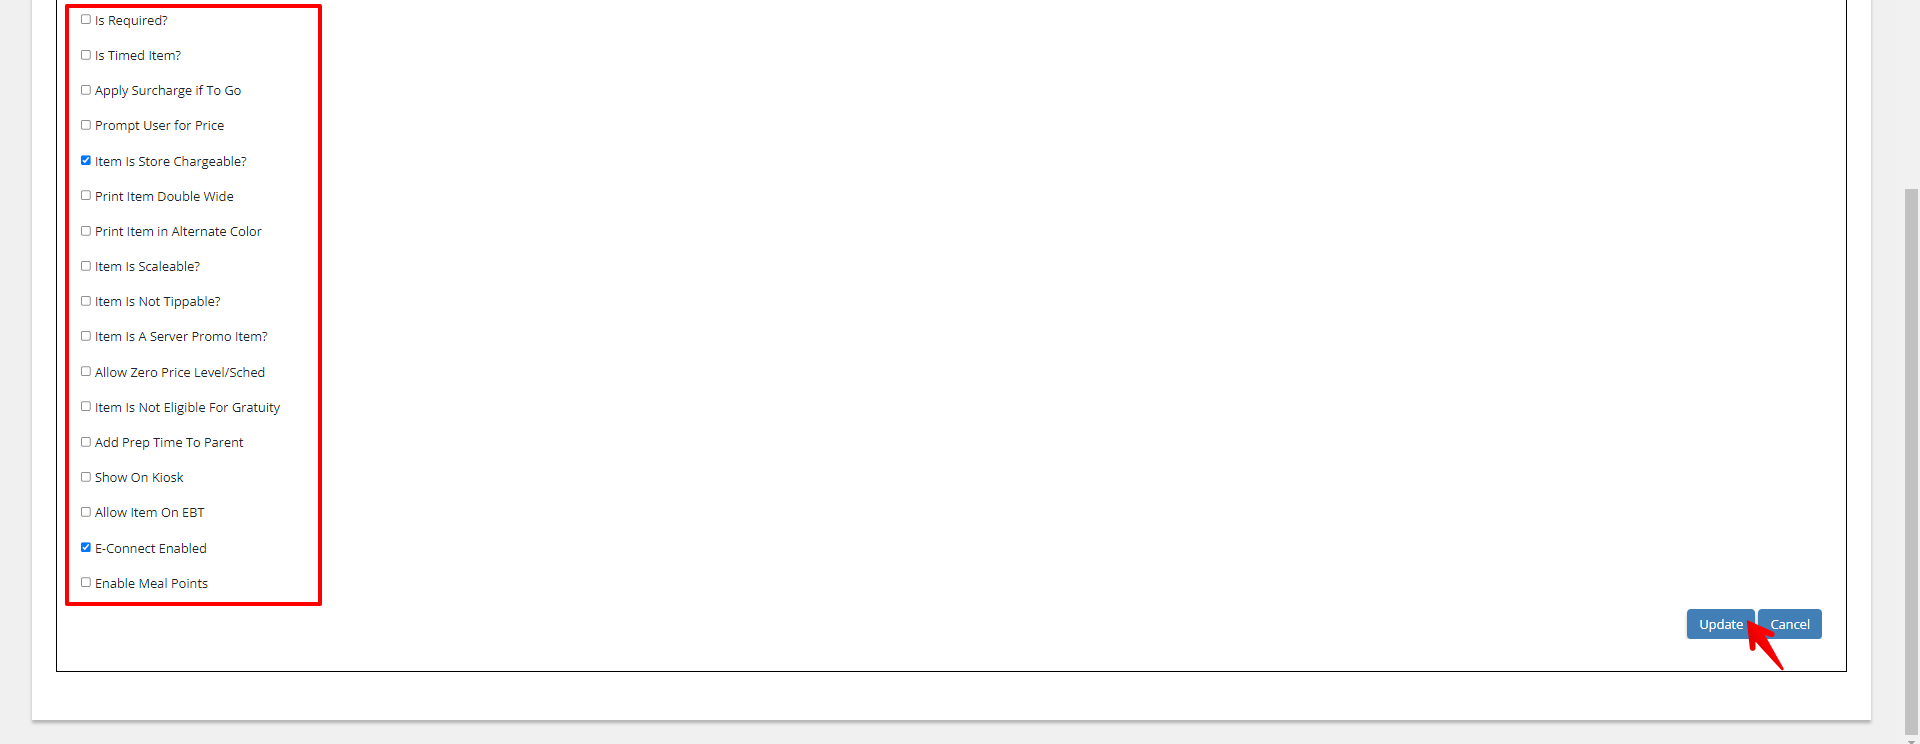
6. Navigate to Advanced Options.
7. Update the following fields:
- Availability
- Set to “Never” if the item should not be displayed in front of the house.
- Set to “Always” or leave Blank (default) if the item should be displayed both in front of the house and in the POS system. (And update other fields as necessary)
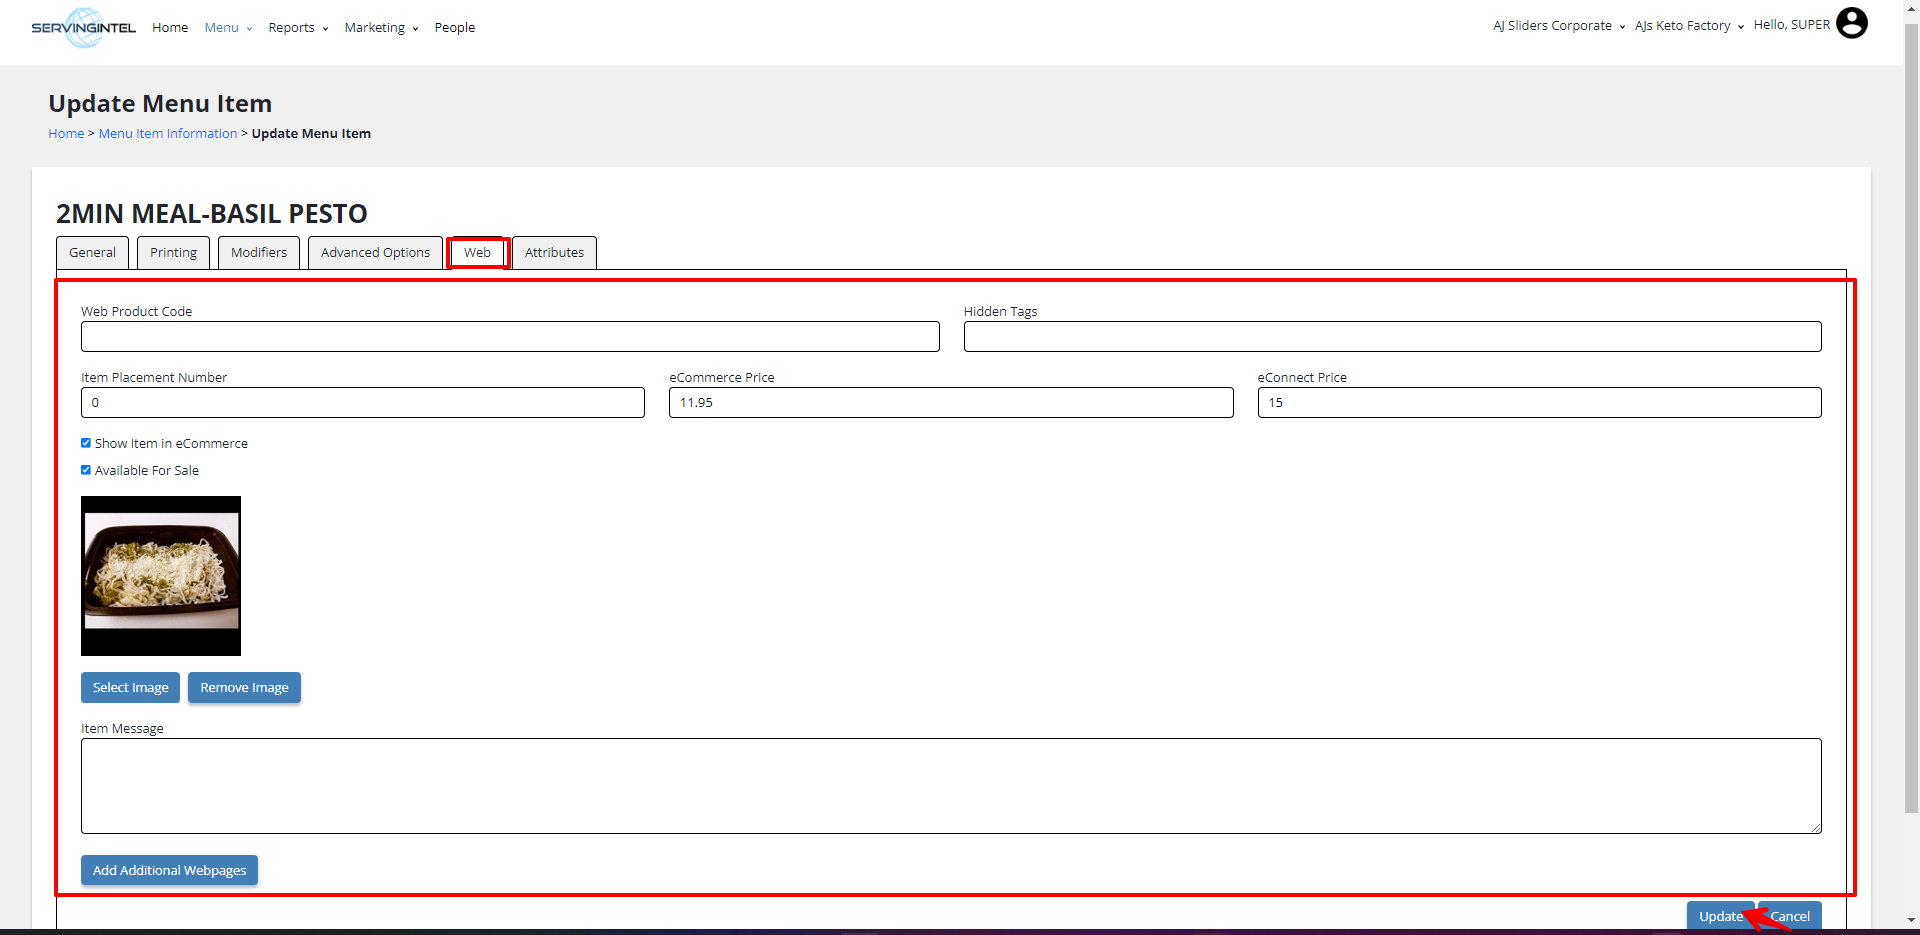
8. Go to the Web tab.
9. Update the following fields:
- Show Item in eCommerce – Tick to display the item in the eCommerce site.
- Available for Sale – Tick to indicate if the item is available for sale.
- Web Item Name – The name of the product as it appears online.
- Web Product Code – The unique code or identifier for the product online.
- Web Description – The detailed description of the product on the website.
- Product Image: Click “Select Image” button, then upload the image file. (And update other fields as needed)
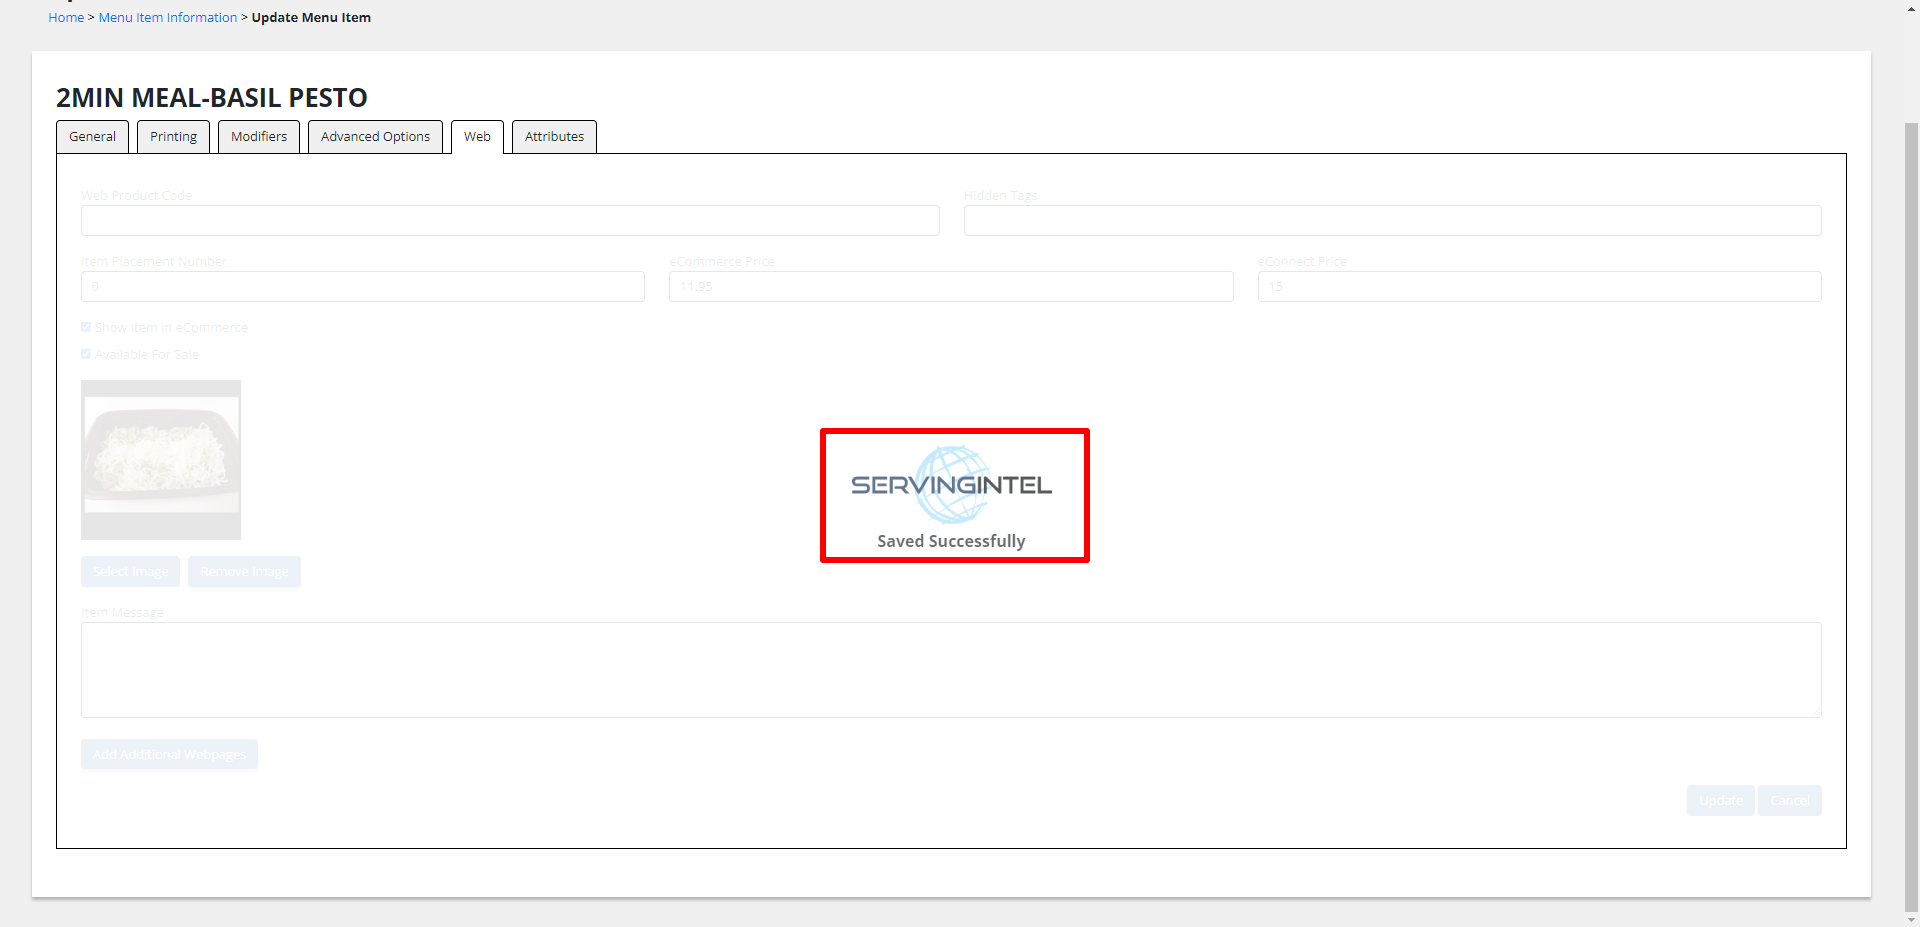
10. Once all updates are completed, click the “Update Menu Item” button.
A status message will appear. After the system has finished saving the updates, a successful message will be displayed.
11. Check the storefront end for the newly added product. Ensure that all details are correctly displayed.
Note:
- Restart FPOS before checking for the item.
- If “Availability” is set as “Never”, verify the item in the Back Office.
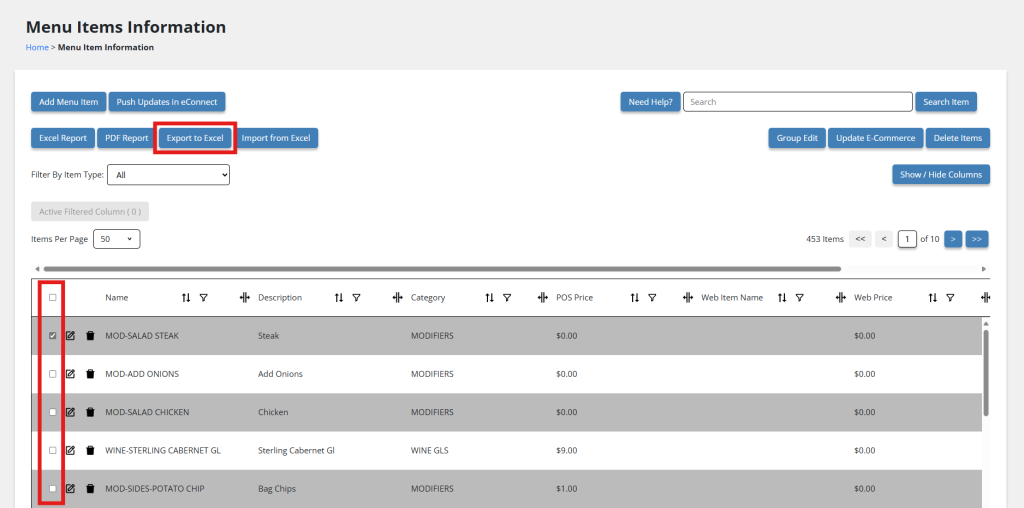
New Feature: Enhanced Item Export
With Version 2025.1.1, the Export to Excel feature is now available. You can now export items information (such as Name, Description, Category, POS Price, etc.) included under the “Show/Hide Columns” menu, regardless of whether they are selected or not.

Ready to Learn More?
See how our innovative dining solutions can help elevate the resident experience and improve operational efficiencies.