SI 360 Staging Process for Terminals and Tablets
#strategic
Managed by ServingIntel Cloud Control Team
Date Published: July 18, 2024
Date Updated: July 18, 2024
Version: 2.0
This will guide you through the SI360 staging process step-by-step. Follow each section carefully to ensure a successful setup.
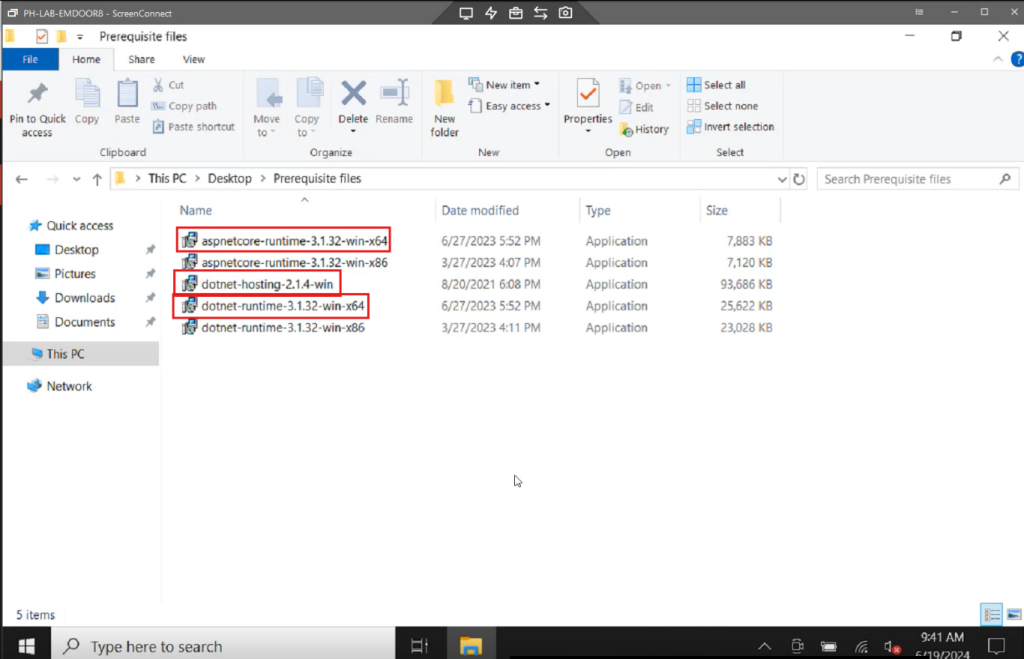
Step 1: Download Prerequisites Files
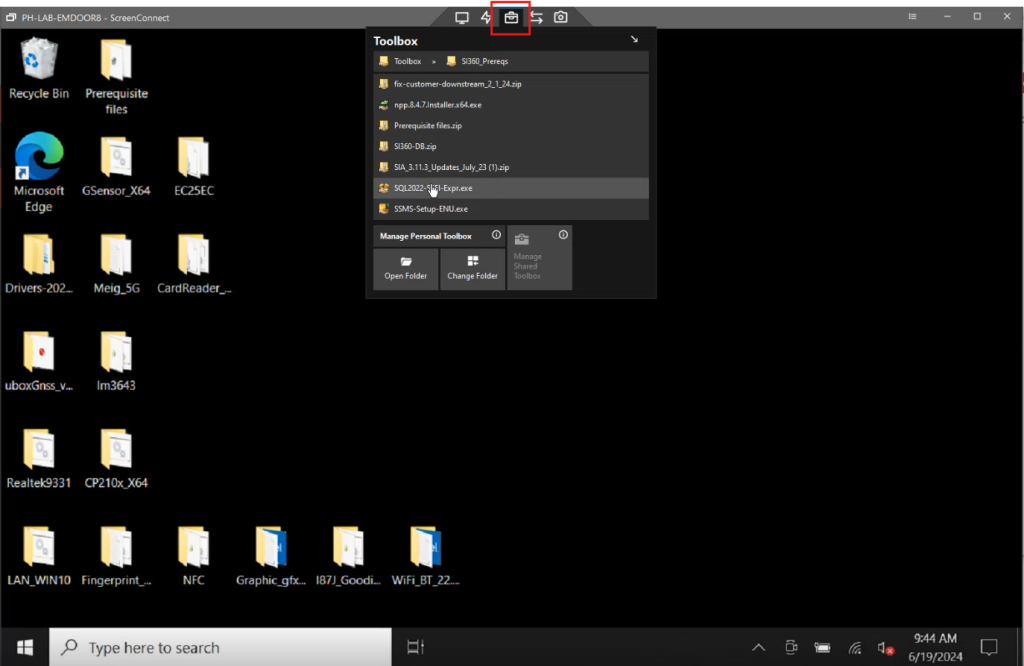
1. Go to the toolbox.
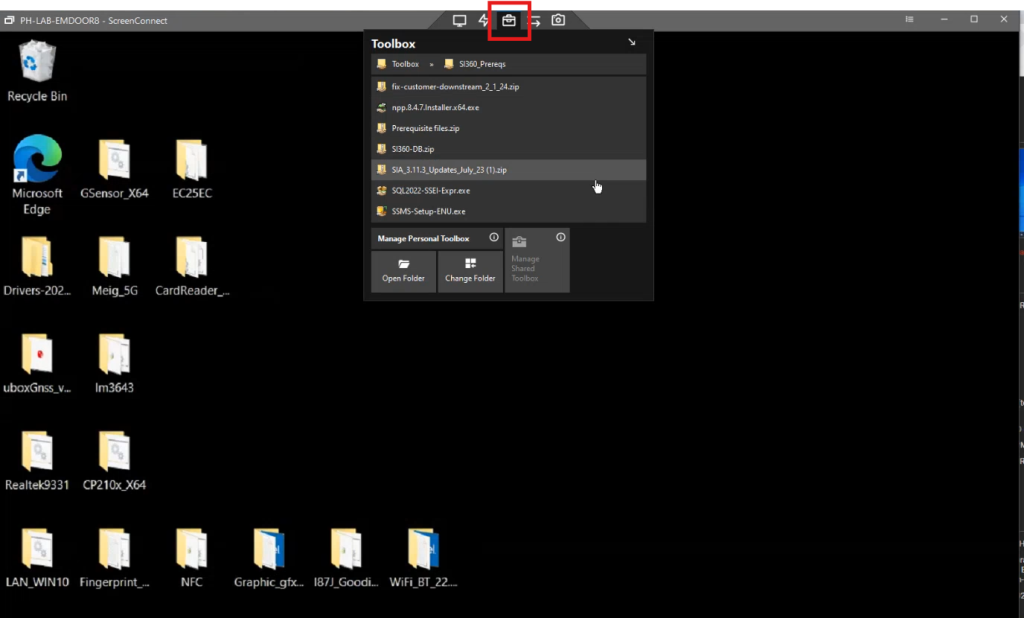
2. Click on the SI360 prerequisites folder.
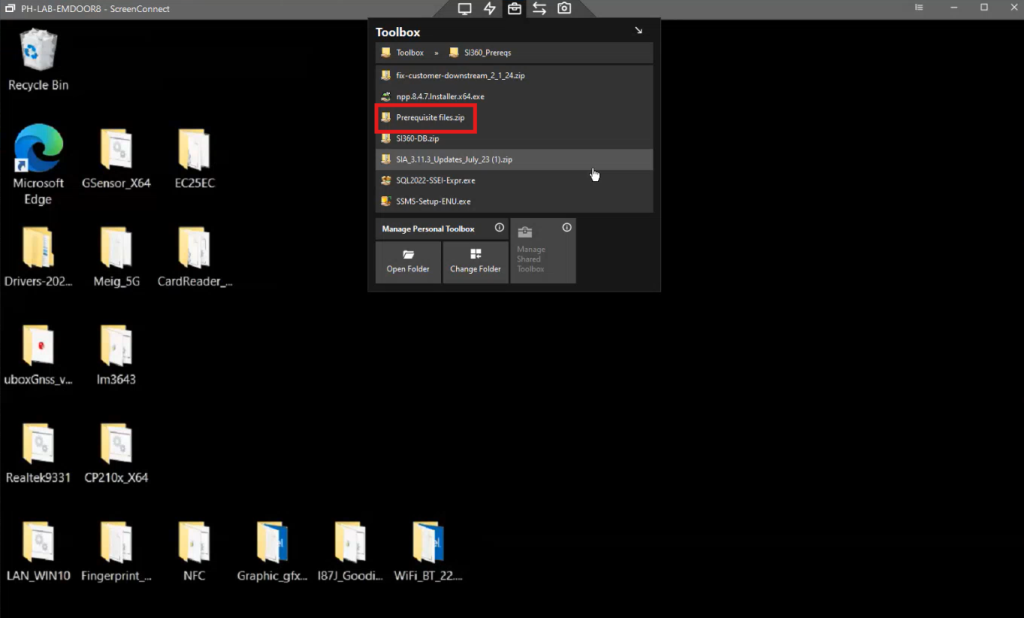
3. Download all data within the prerequisite files.
Important Notes
- SI360 (installed in a tablet or regular terminal) requires Management Studio, unlike Future POS, where only the server and backup server require Management Studio.
- SI360 consists of a local database and the actual SICC database.
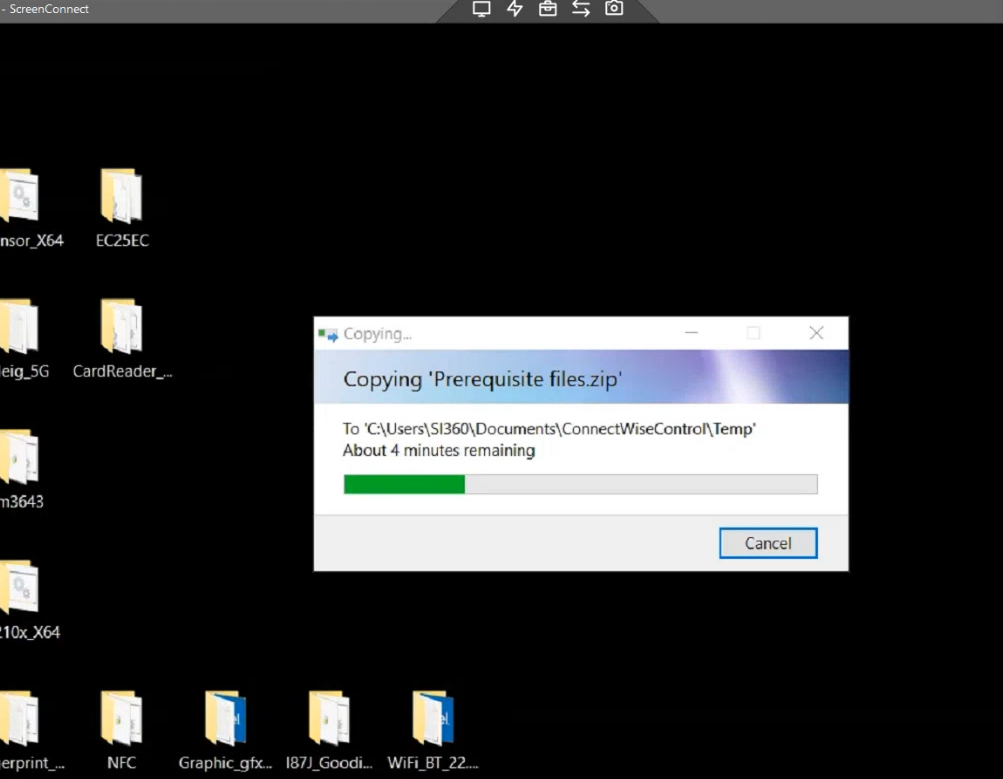
Step 2: Install Prerequisite Software (Extract and Install Files)
1. Extract the downloaded prerequisite files.
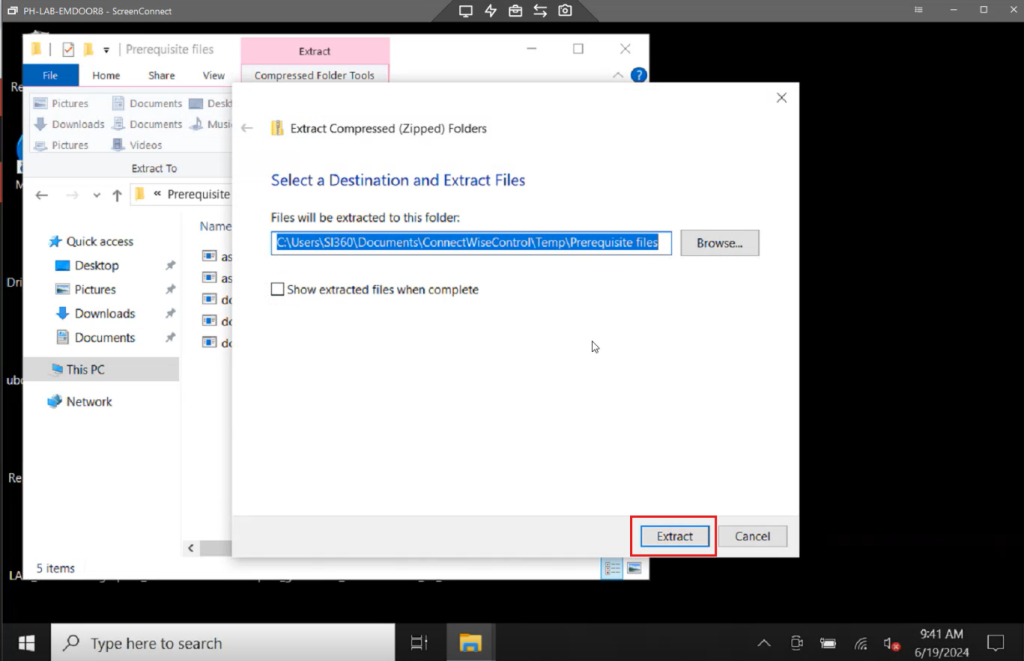
2. Install the following:
- aspnetcore-runtime-3.1.32-win-x64
- dotnet-hosting-2.1.4-win
- dotnet-runtime-3.1.32-win-x64
Additional Downloads
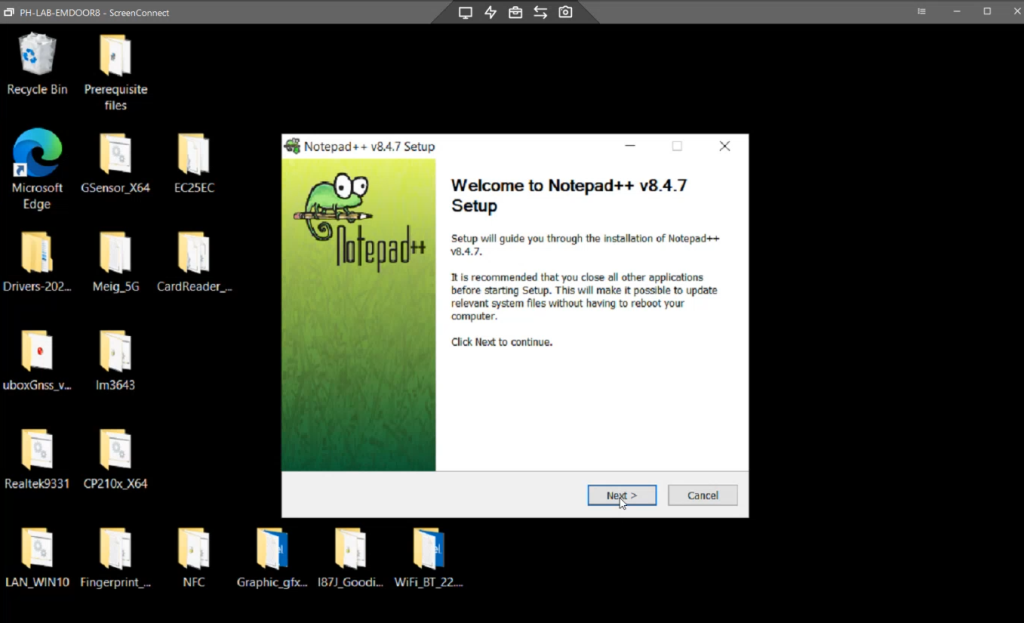
1. Go back to the toolbox and download Notepad++.
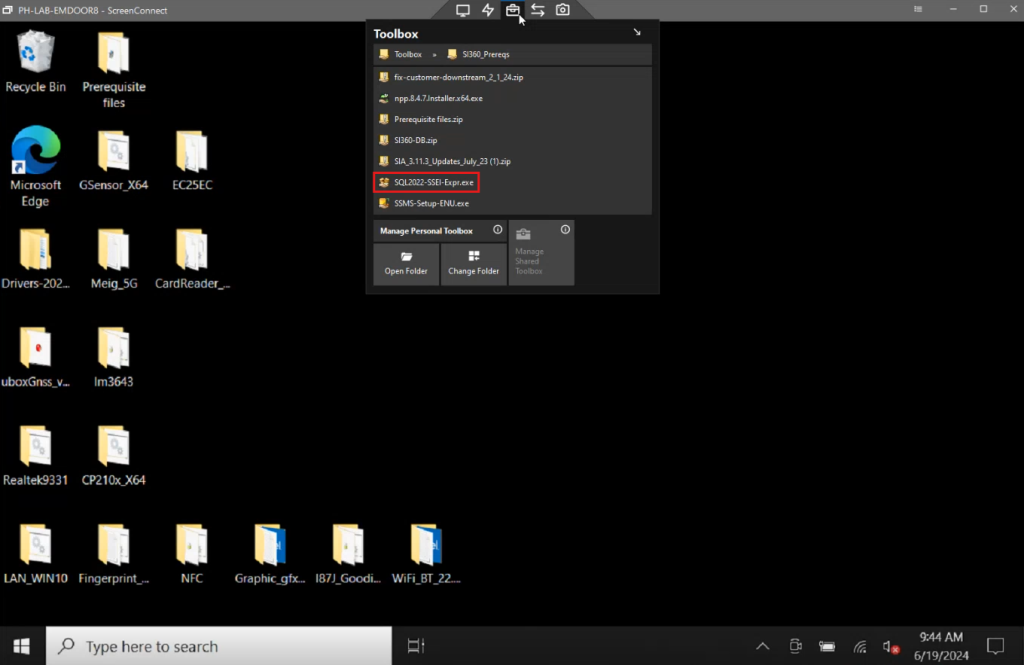
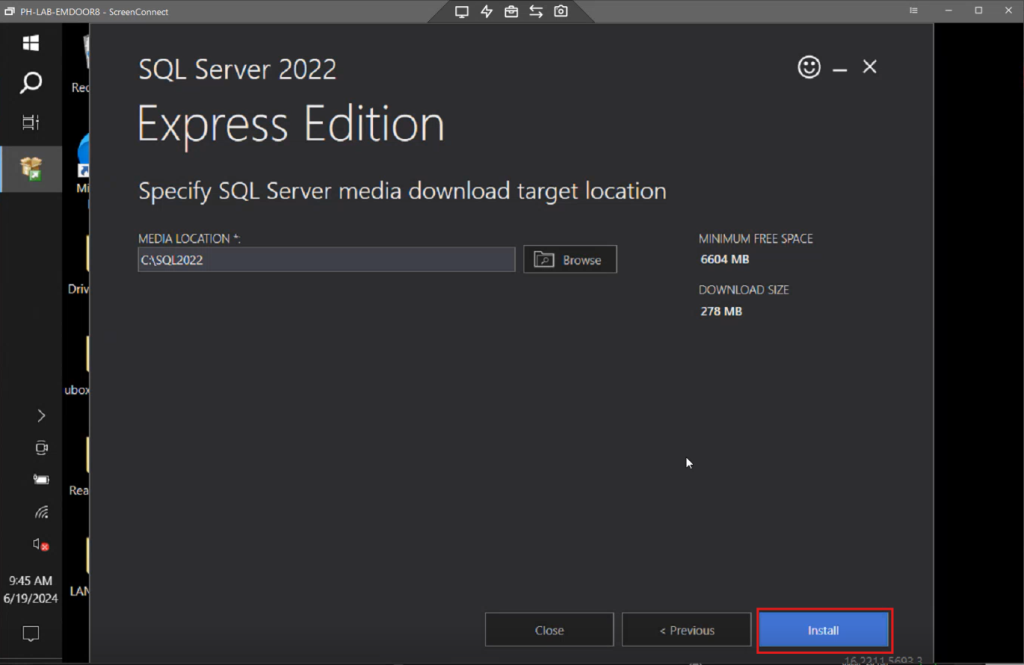
2. After, return to the toolbox and download SQL Server 2022.
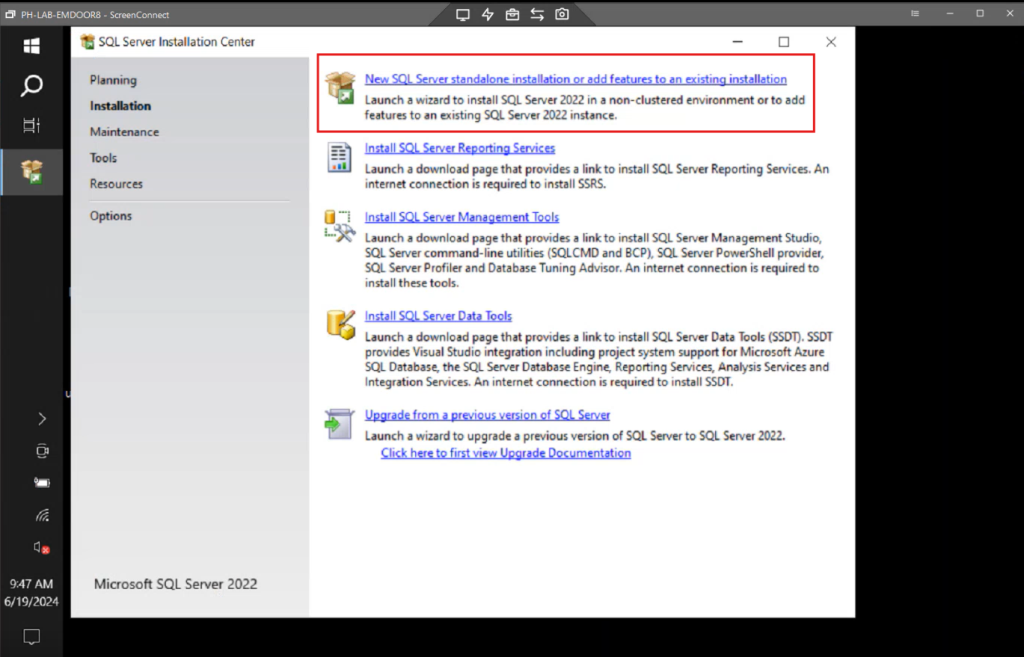
Step 3: SQL Server 2022 Installation
1. Open the SQL Server 2022 installer.
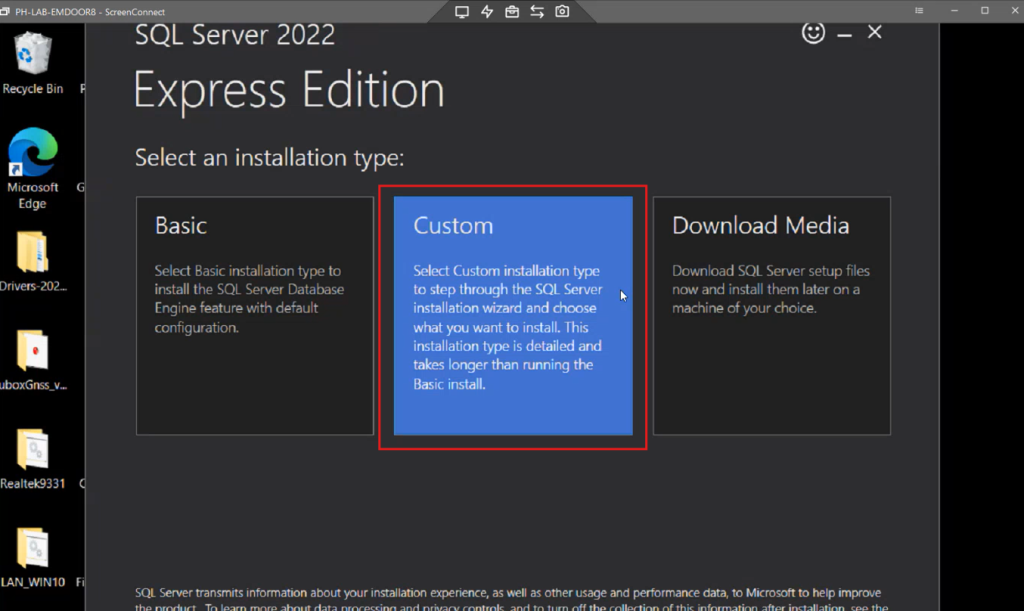
2. Click Custom, then click Install.
3. Choose New SQL Server standalone installation or add features to an existing installation.
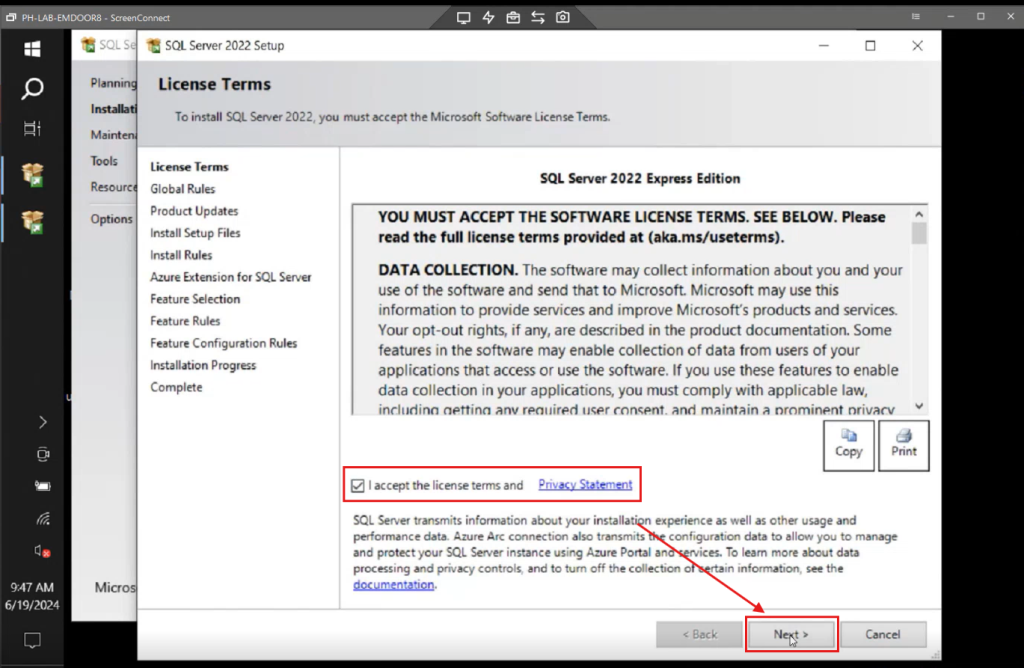
License and Features
1. Accept the license terms and privacy statement, then click Next.
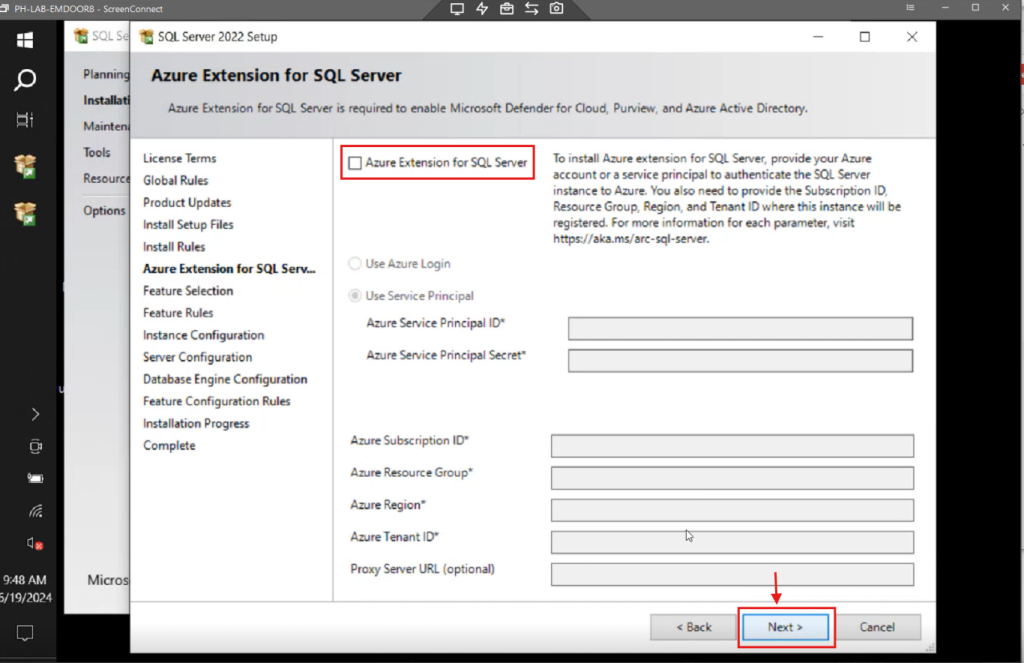
2. Untick the Azure Extension for SQL Server option, then click Next repeatedly until the setup proceeds.
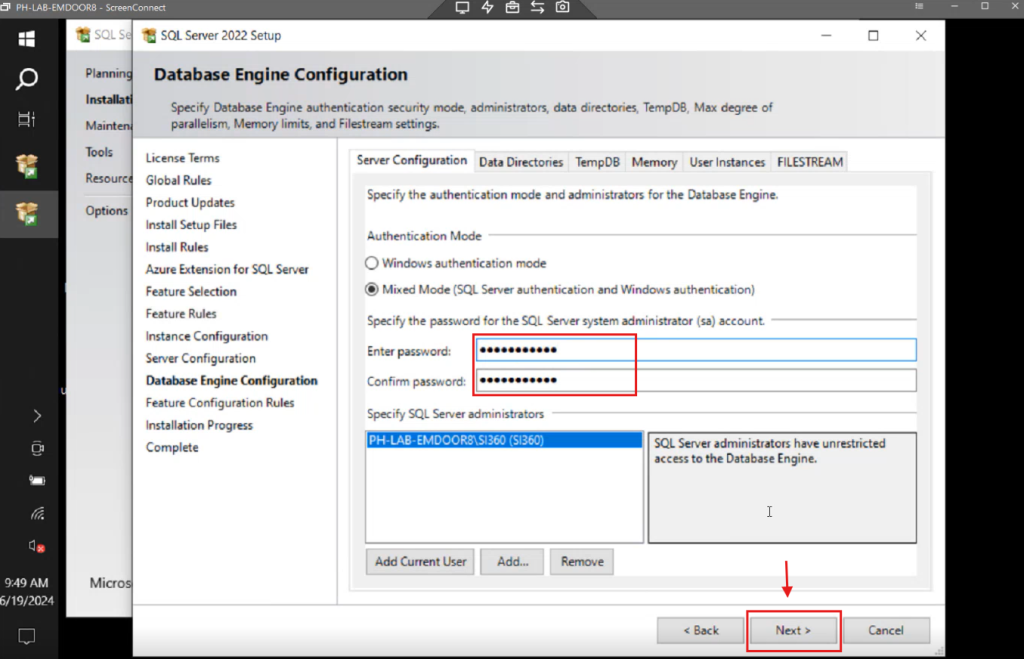
3. Ensure to select Mixed Mode (SQL Server authentication and Windows authentication).
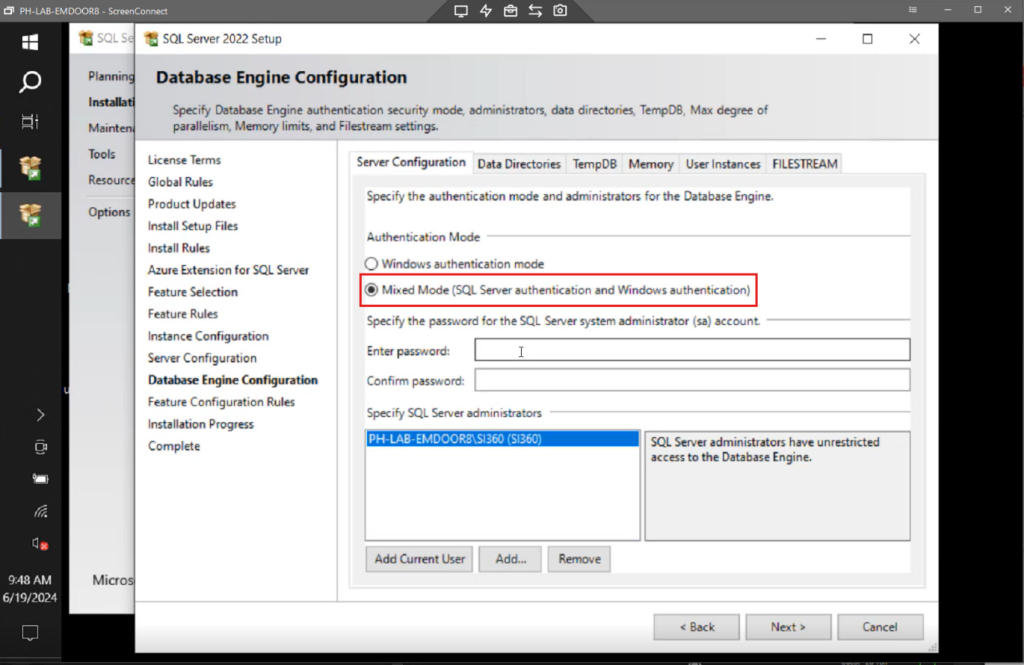
4. Enter the password: ces*******, then click Next.
Step 4: Install SSMS (SQL Server Management Studio)
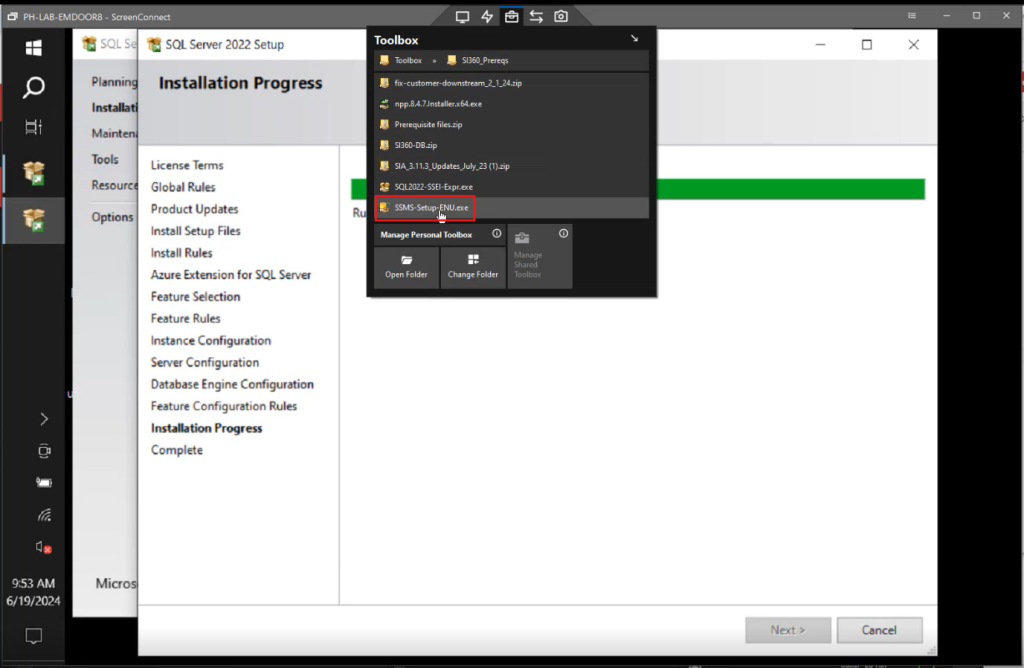
1. While waiting for SQL Server 2022 to install, go back to the toolbox.
2. Click the SSMS Setup file and install it.
Important Note
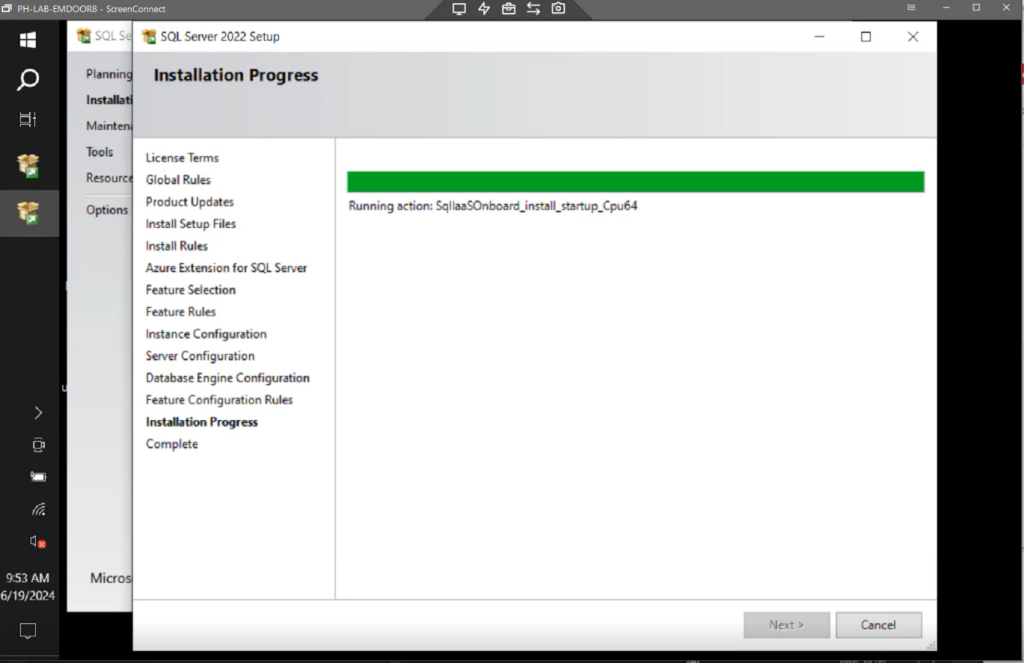
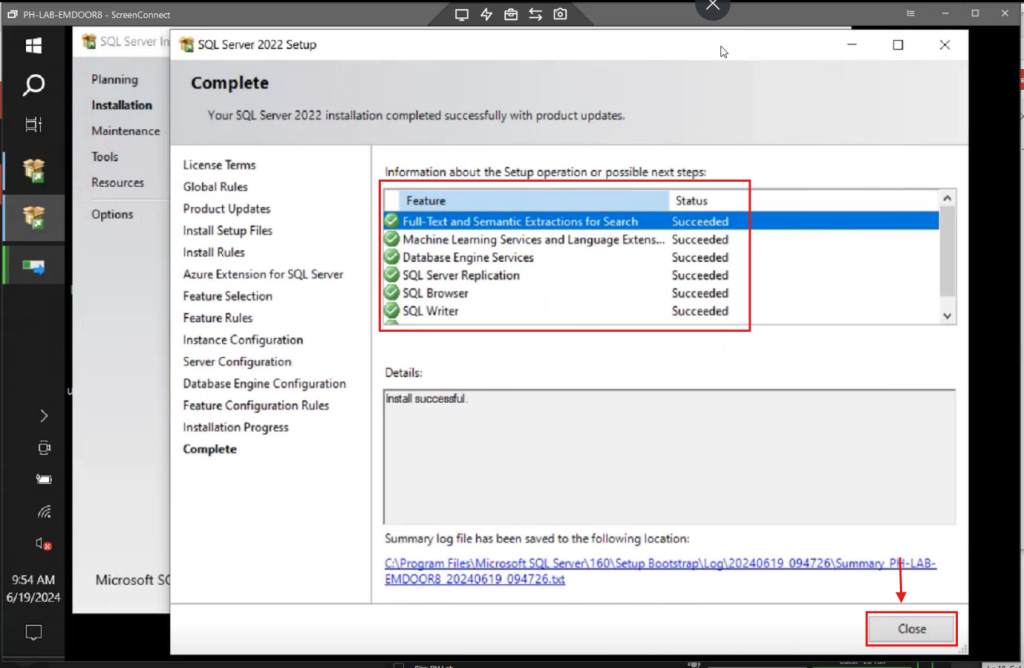
- Ensure that after the SQL Server 2022 installation, all feature statuses show succeeded. Then hit Close.
Step 5: Configure SQL Server
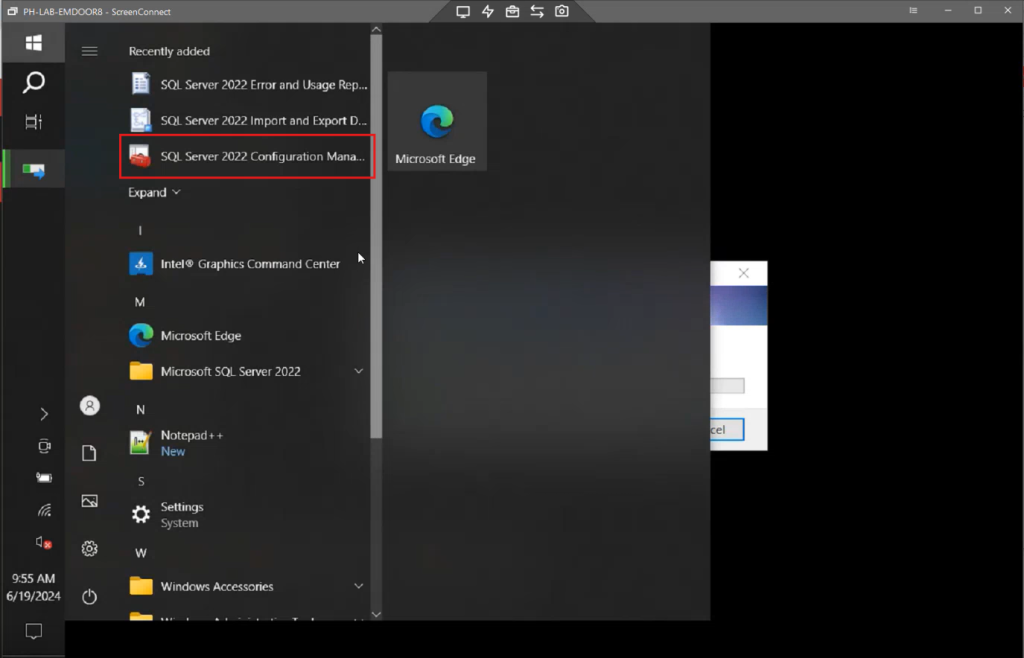
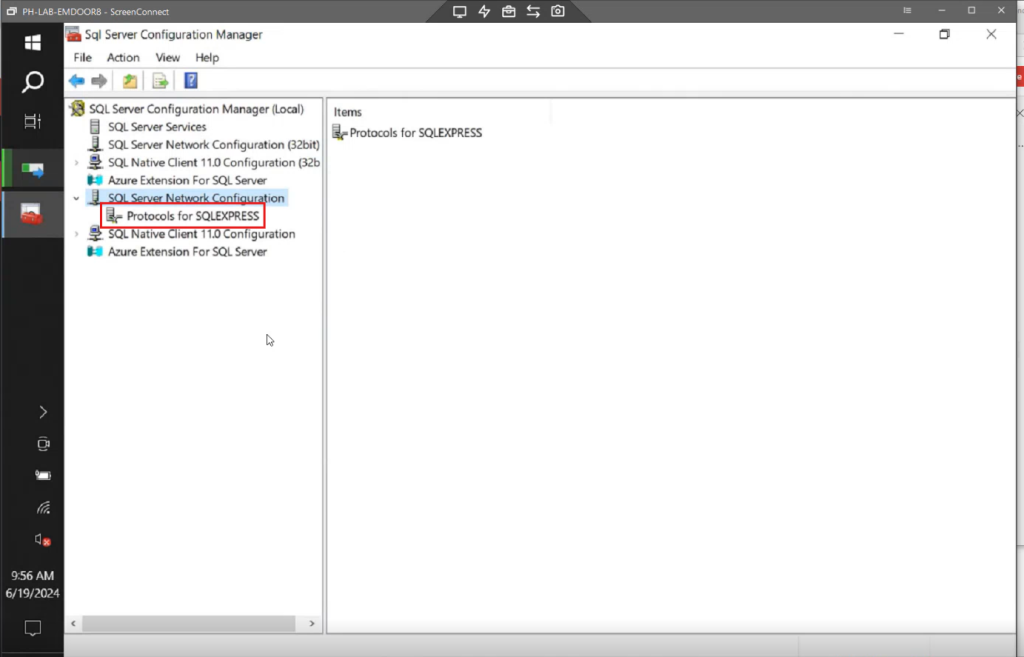
1. Click the Windows button and open SQL Server 2022 Configuration Manager.
2. Under SQL Server Network Configuration, expand the options.
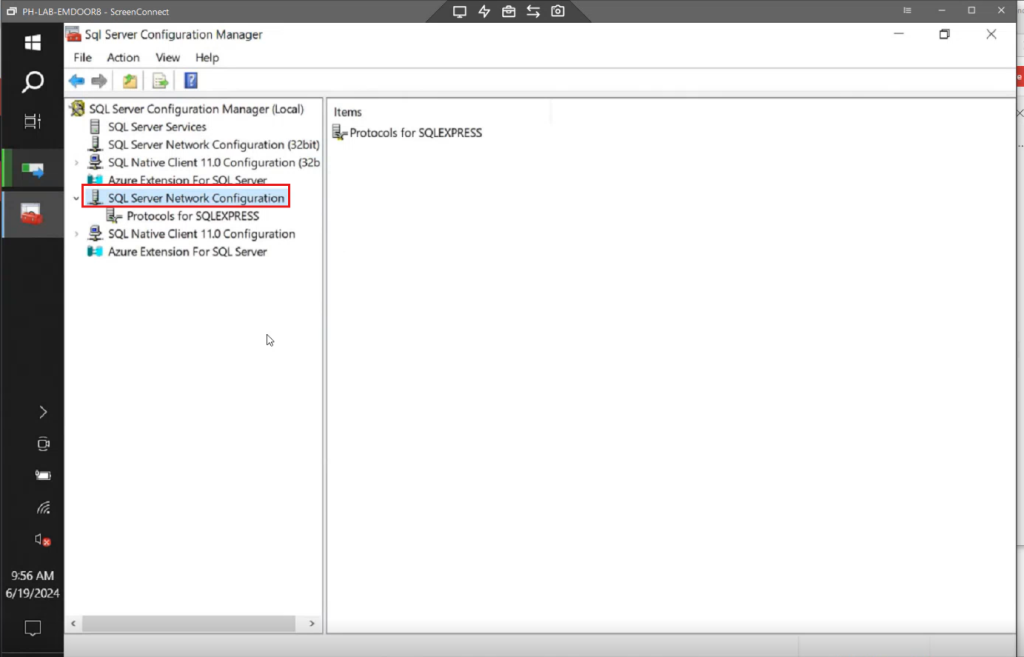
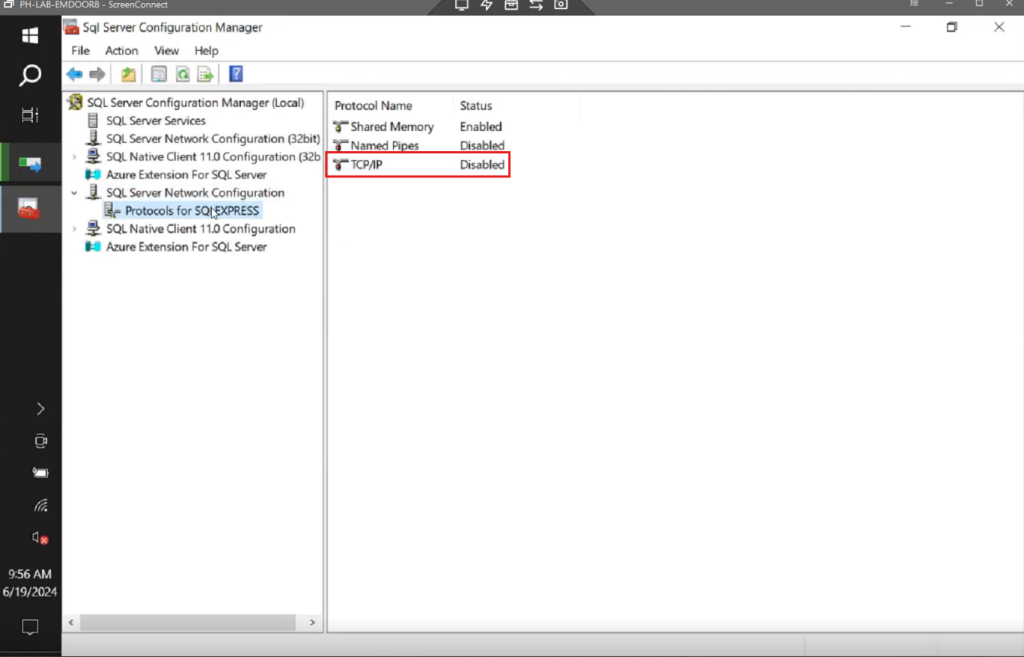
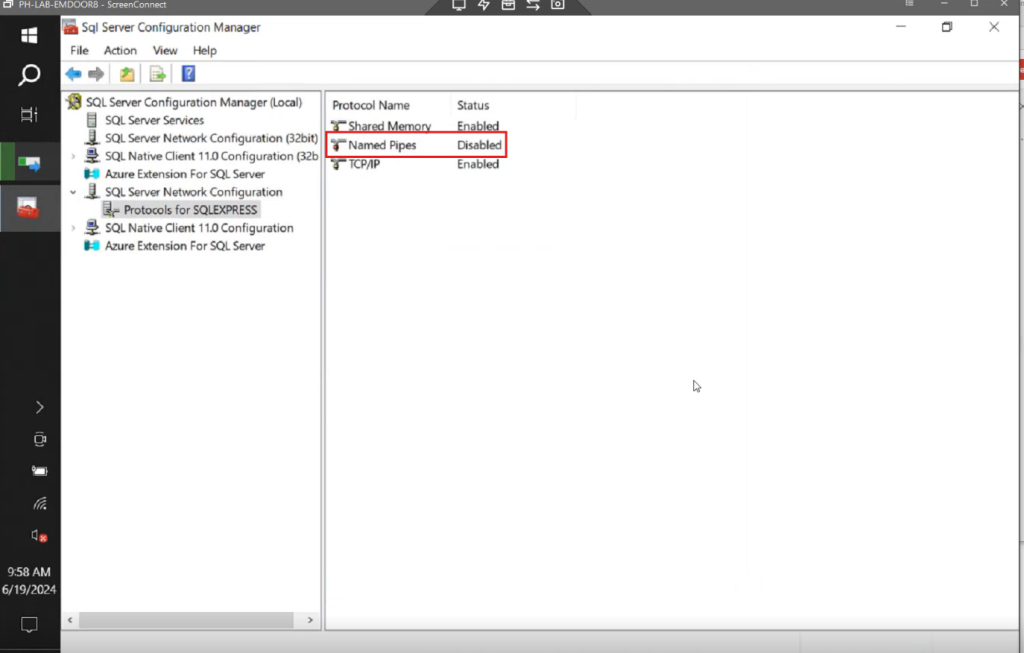
3. Go to Protocols for SQL Express.
Enable Protocols
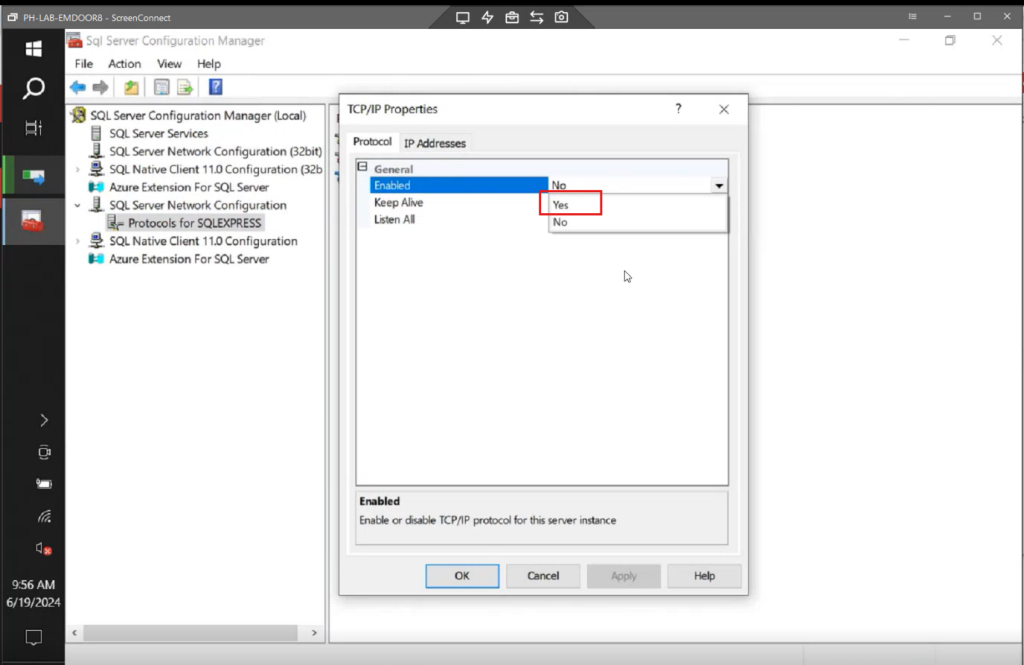
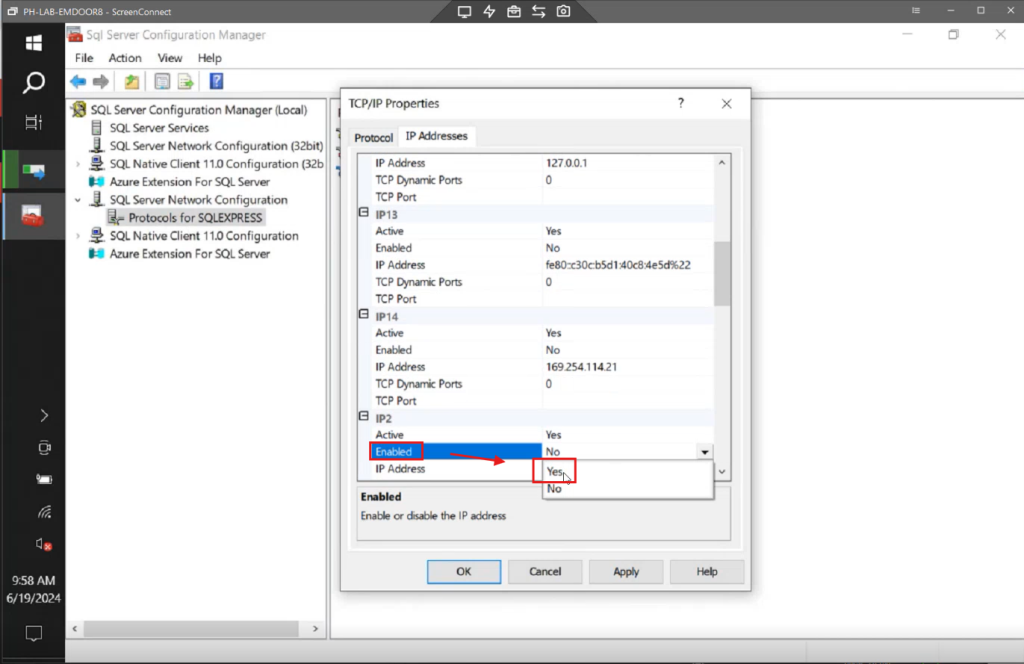
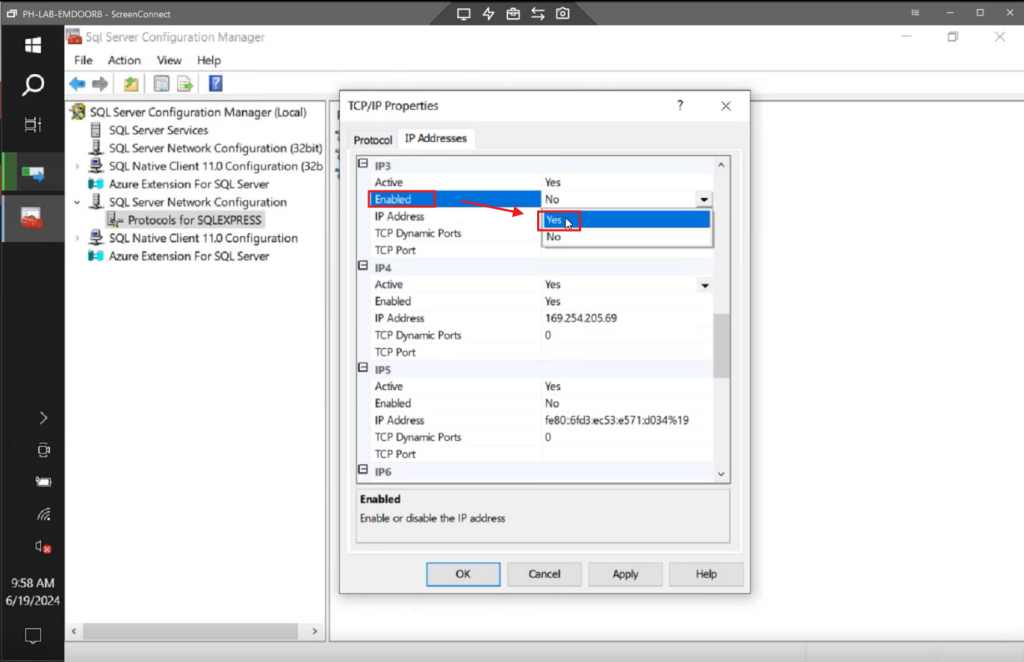
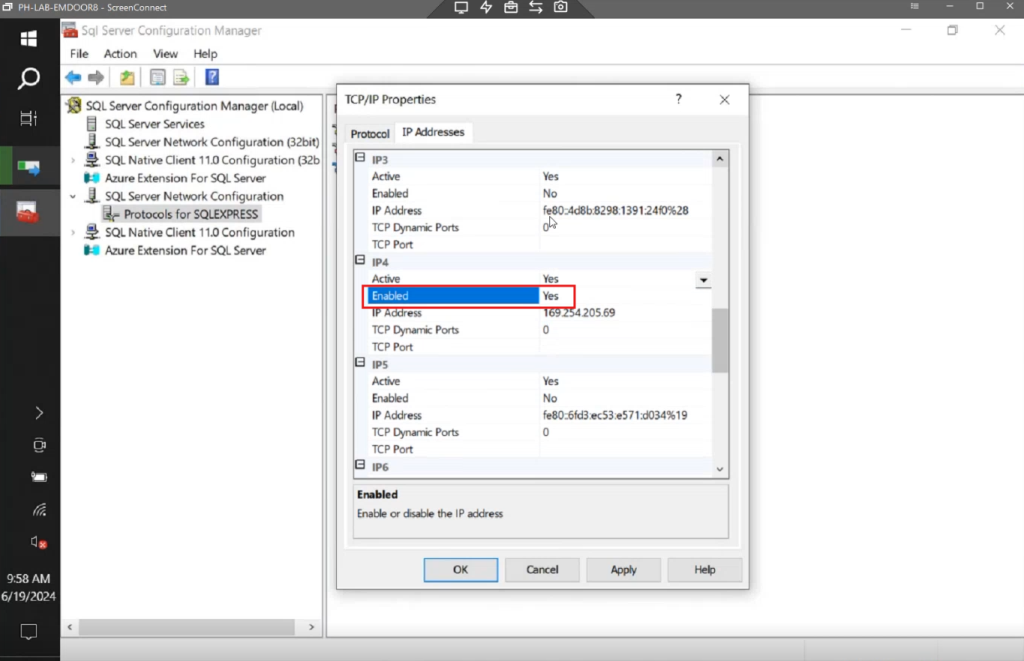
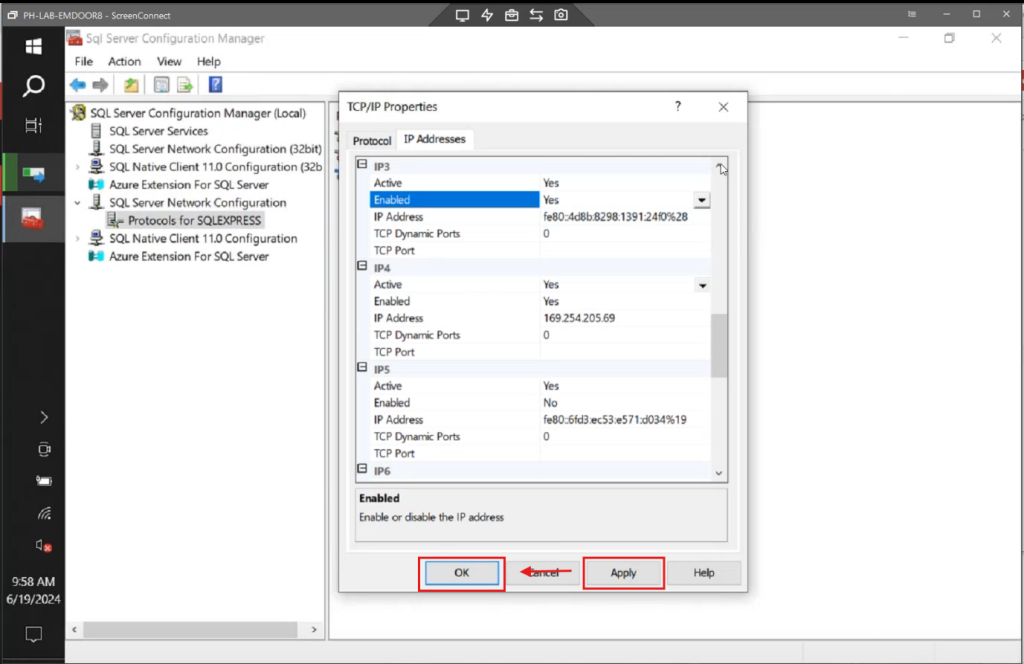
1. Enable TCP/IP. Don’t hit the Apply and OK button yet.
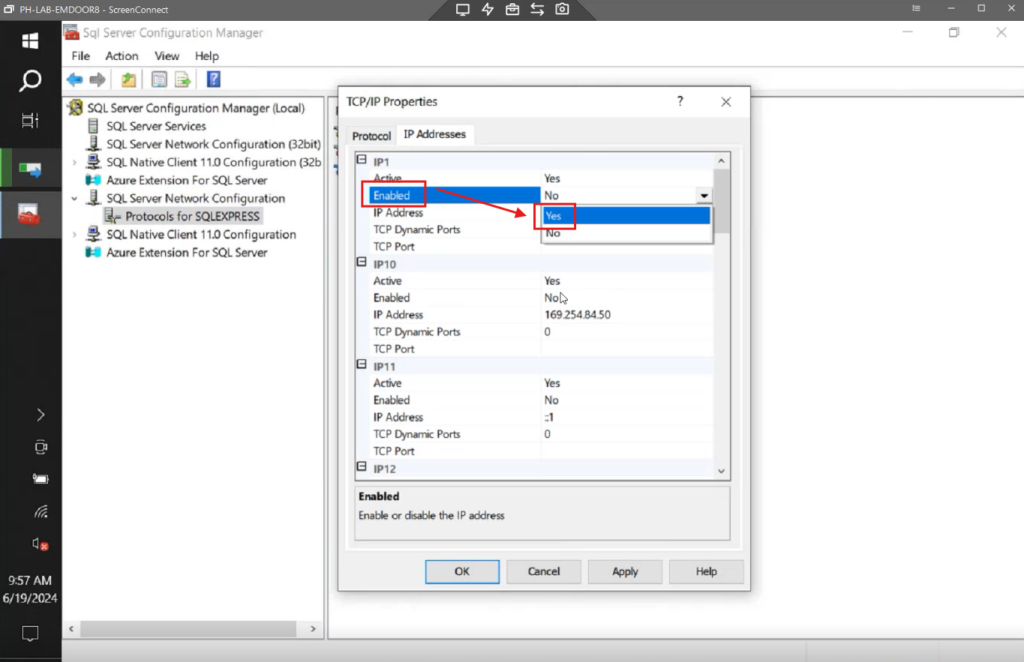
2. Under IP Addresses, ensure IP 1, IP2, IP3, and IP4 are enabled. After, hit Apply then OK.
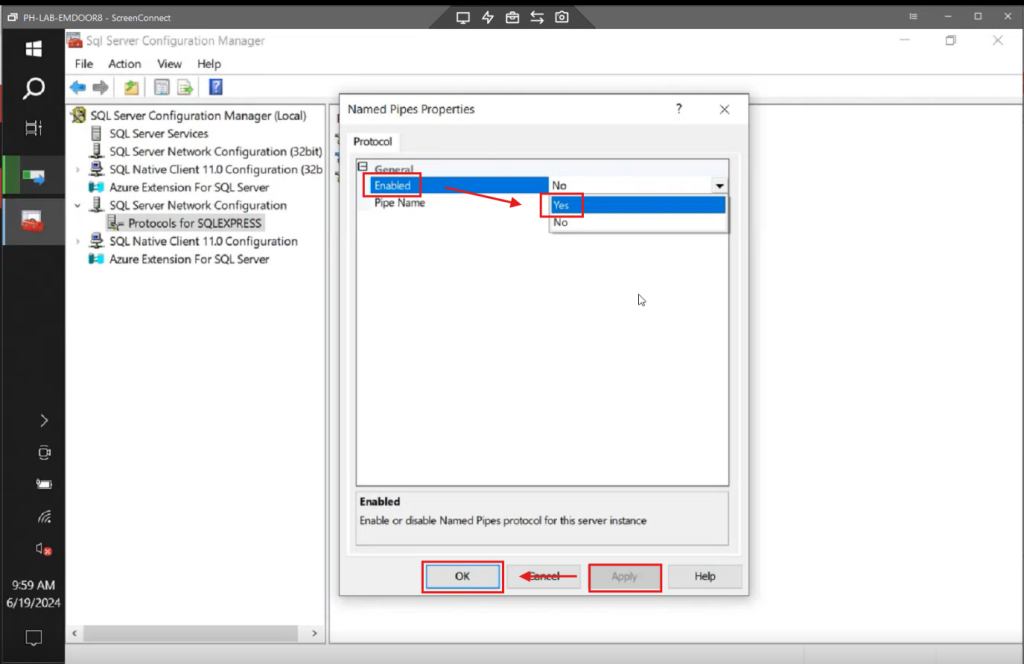
3. Enable Named Pipes. Hit Apply then OK.
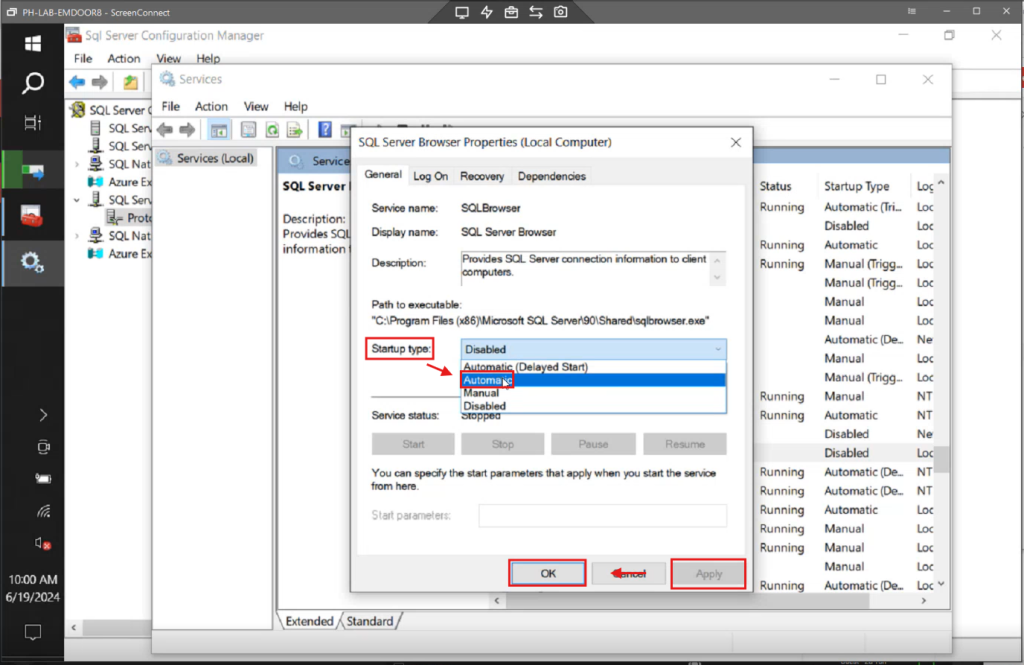
Step 6: Service Configuration
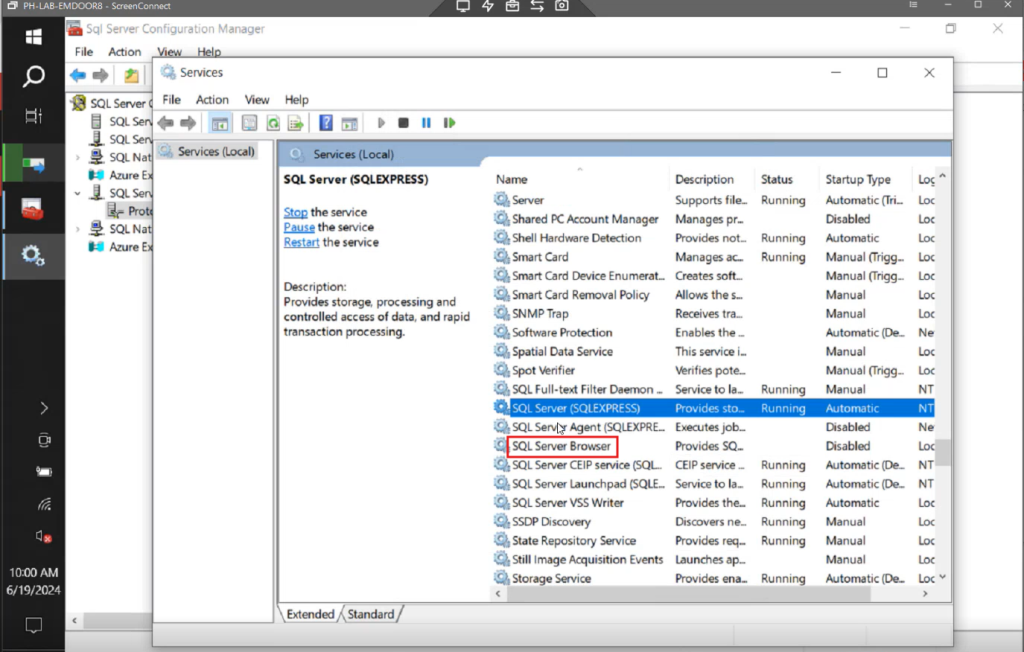
1. Open SQL Server Configuration Manager again and type services.msc.

2. Locate SQL Server Express.
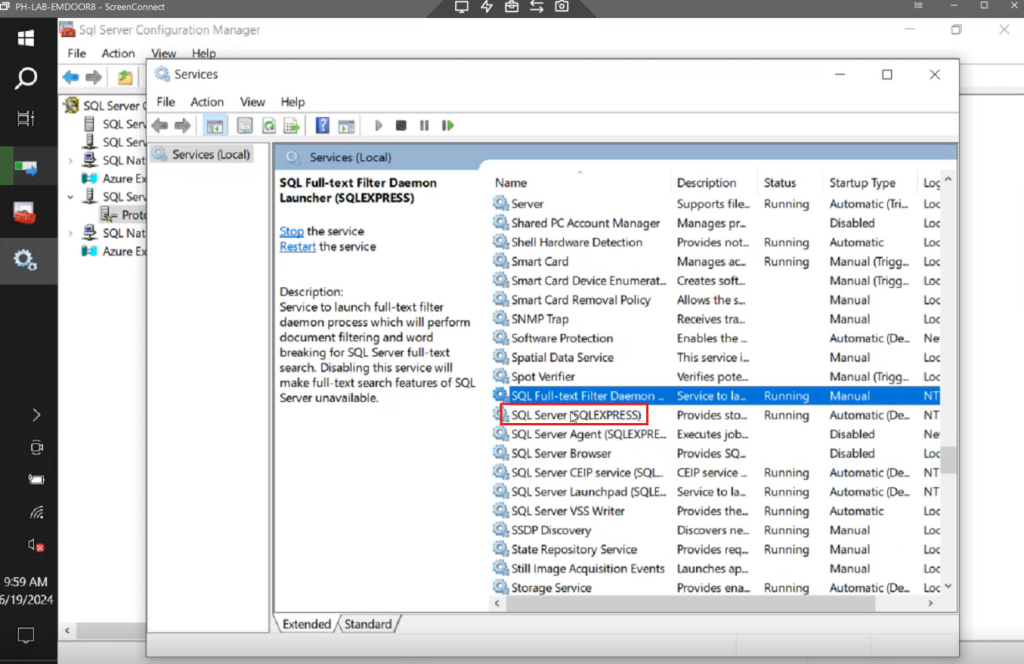
3. Double-click and set the Startup type to Automatic, then apply and click OK.

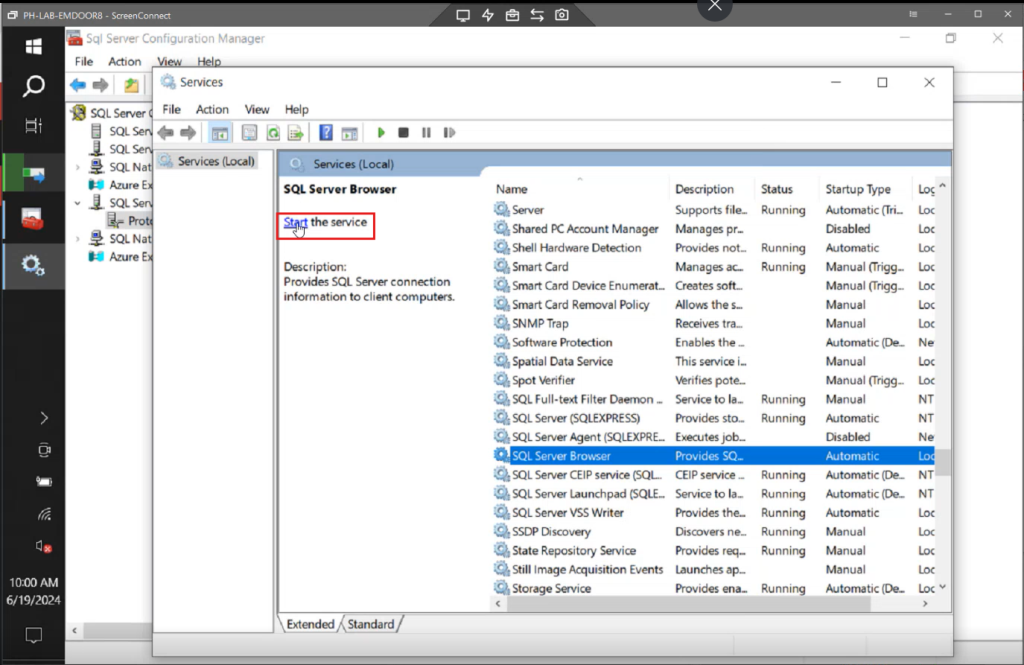
4. Do the same for SQL Server Browser.
Important Note
- All these settings apply to all devices, not just the server or terminal. Ensure the services are running by clicking Start.
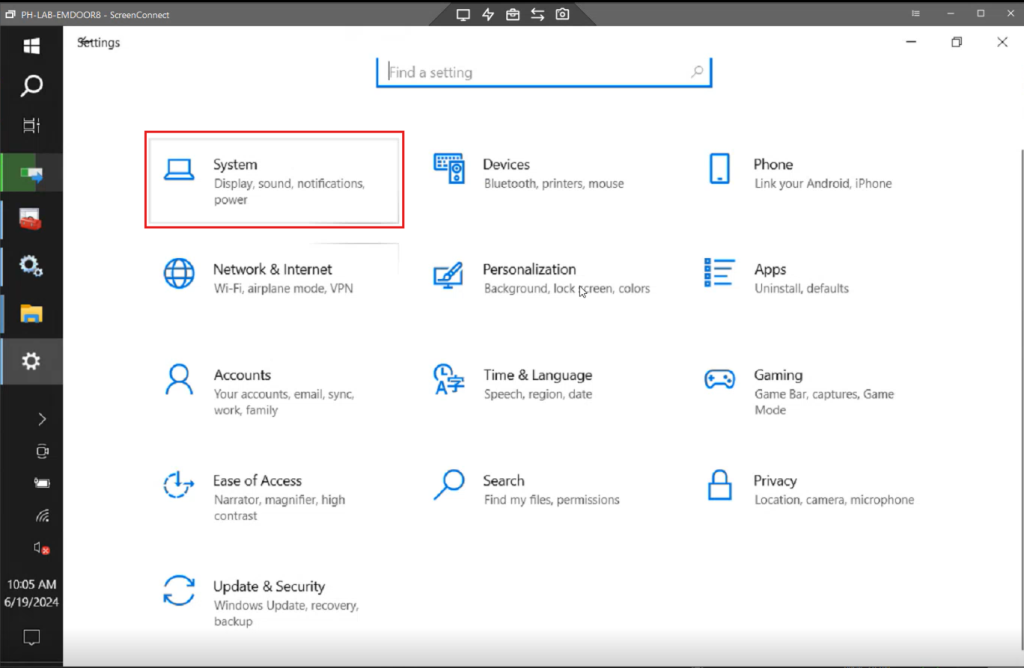
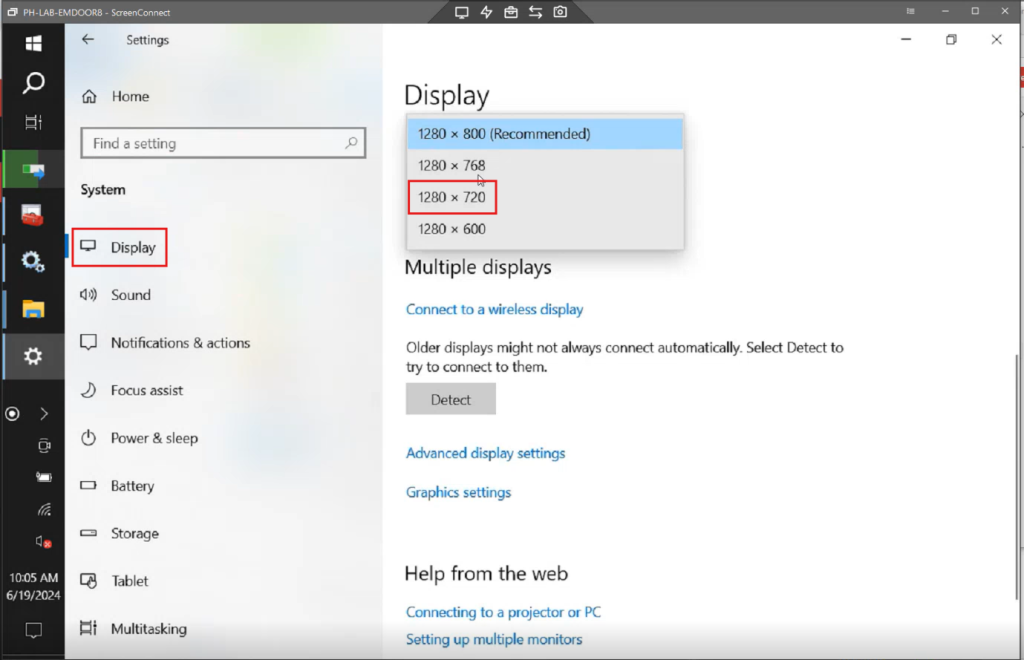
Step 7: Screen Resolution for SI360 Tablets
1. Go to Windows Settings, then System.
2. Go to Display, then set the screen resolution to 1280 x 720.
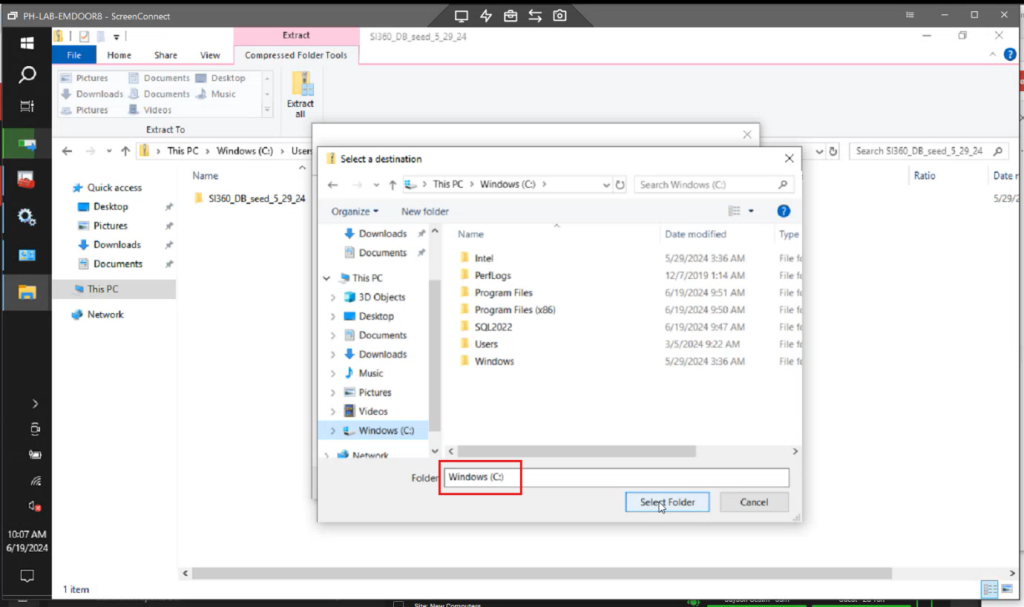
Step 8: SI360 DB Seed File
1. Extract the SI360 DB seed file.
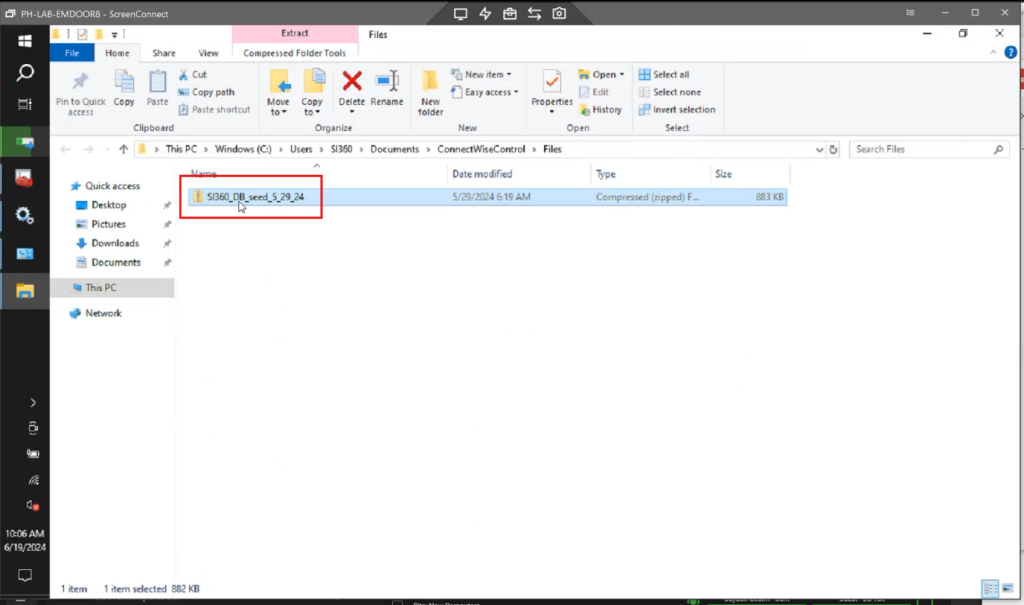
2. After extracting the files, place it under Windows C: drive.
Important Notes
- Part of the staging process involves importing the terminal database in Management Studio.
- For SI360 installation, the server needs to have an SI agent, and if there is no E-com, local sync is not required.
- Ensure the correct time zone is set.
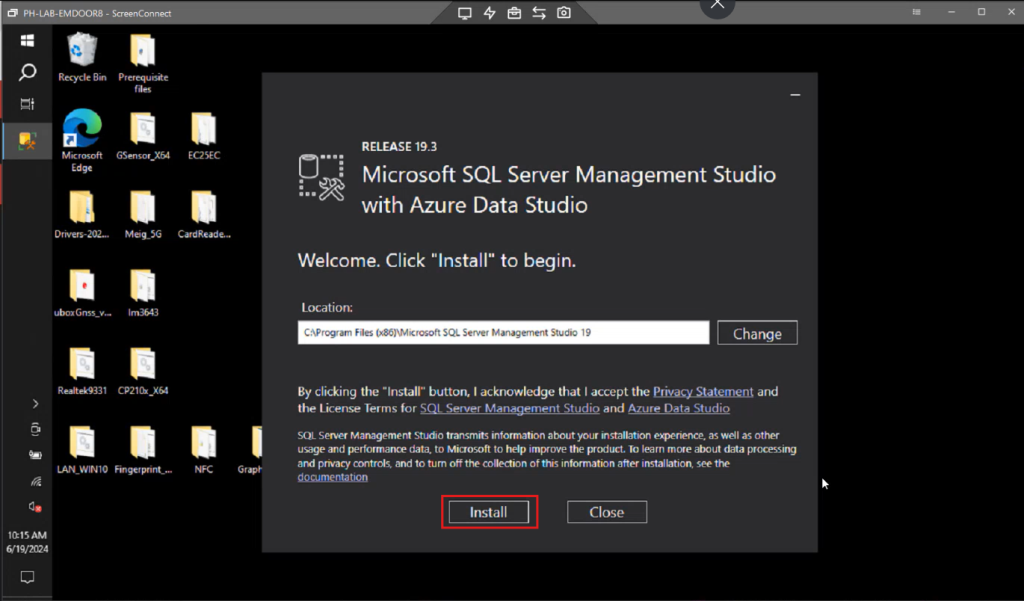
Step 9: Complete SSMS Installation
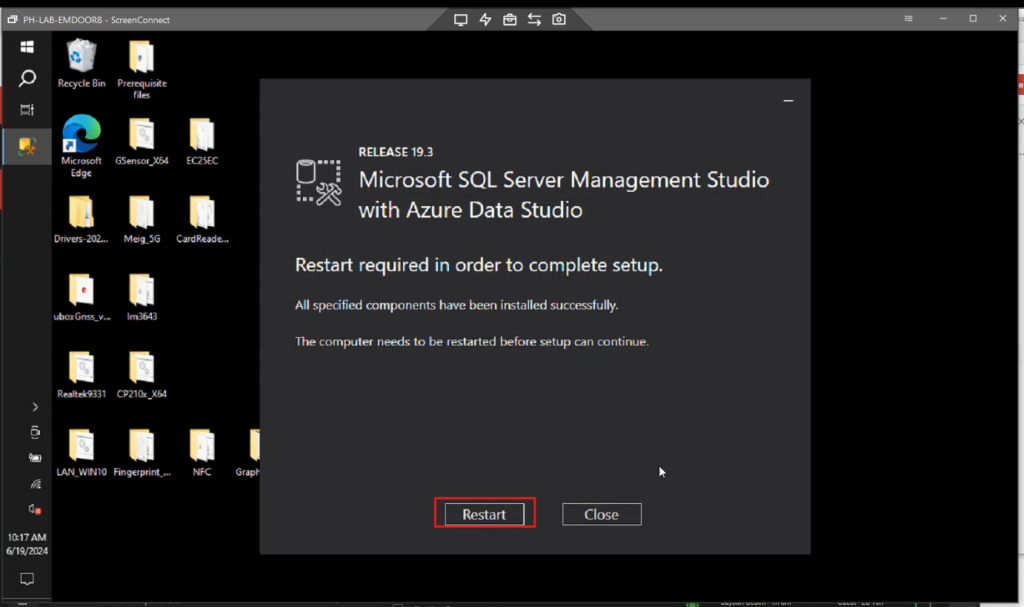
1. After SSMS (SQL Server Management Studio) has downloaded, click Install.
2. Once installed, click Restart.
Important Note
- After installing SQL Server Management Studio, the final part of the staging process is to import the site’s local database. This step ensures that your C: drive database contains the latest schema, including all updated files and tables necessary for the system or database to function correctly.
Step 10: Import the Local Database
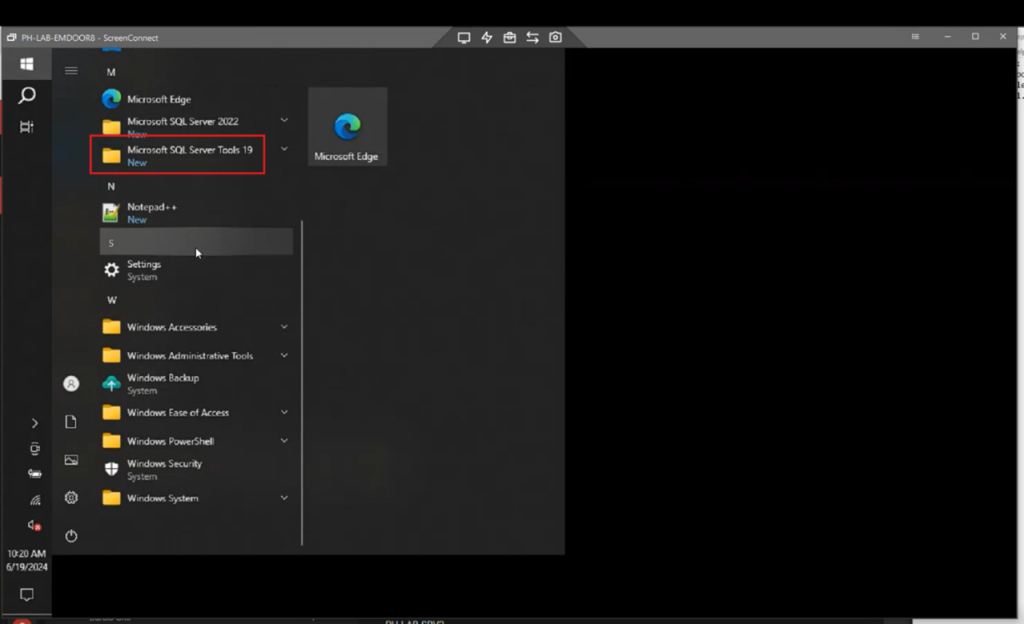
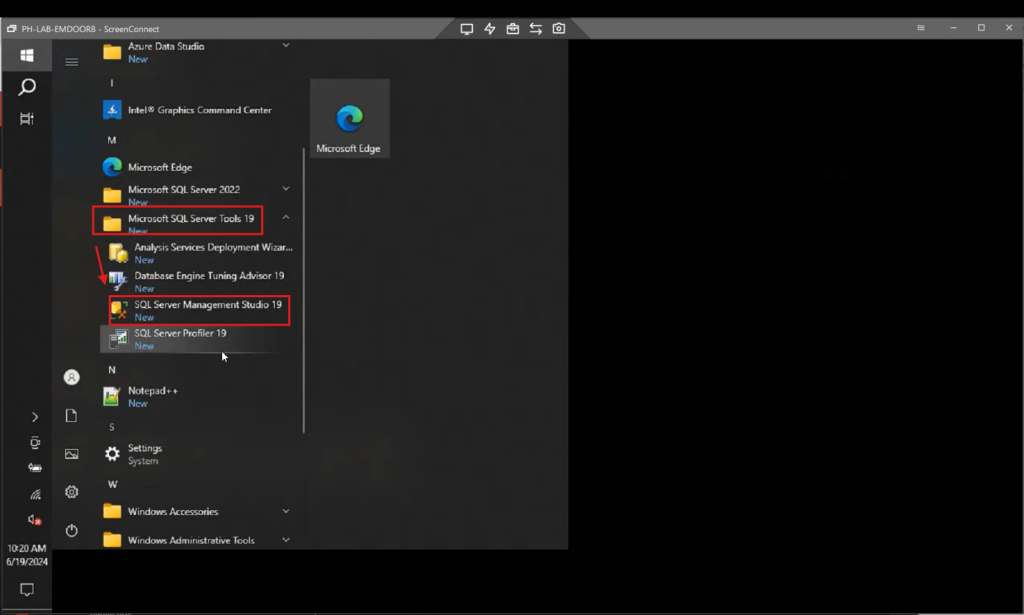
1. After the restart, click the Windows button and open Microsoft SQL Server Tools 19.
2. Open SQL Server Management Studio.
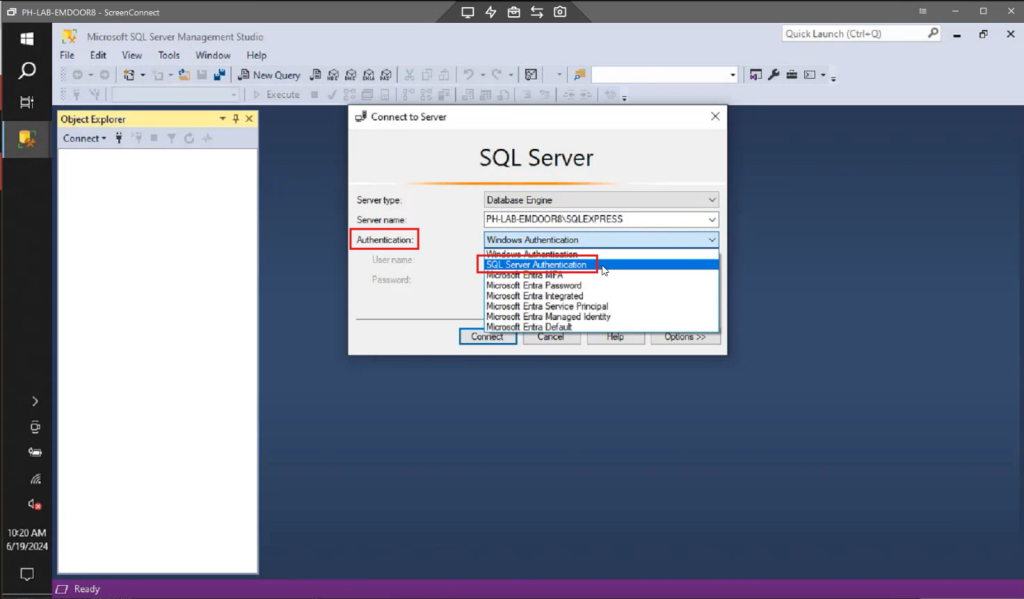
3. Under Authentication, select SQL Server Authentication.
4. Log in with:
- User: sa
- Password: ces********
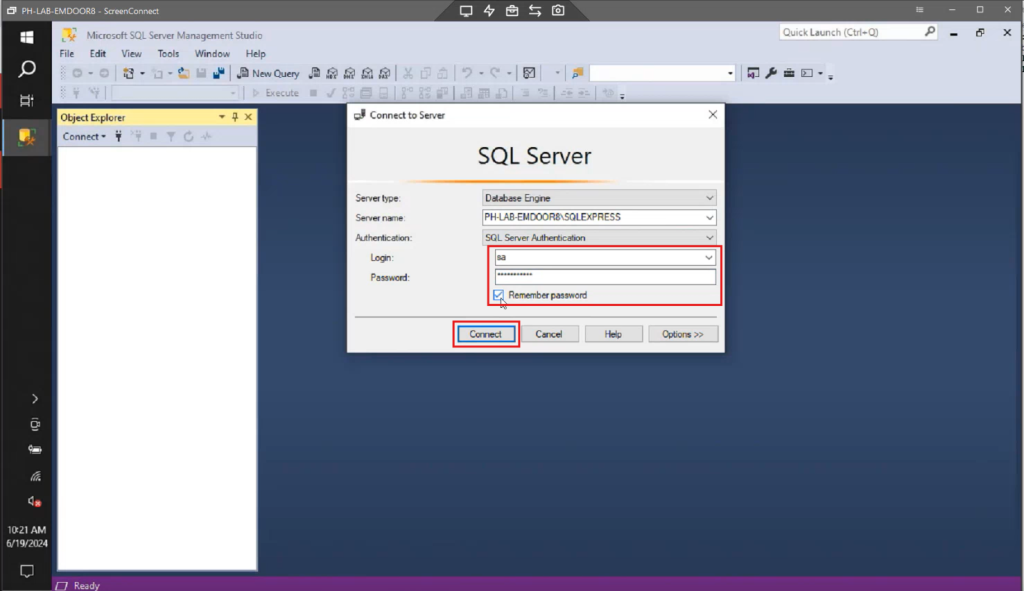
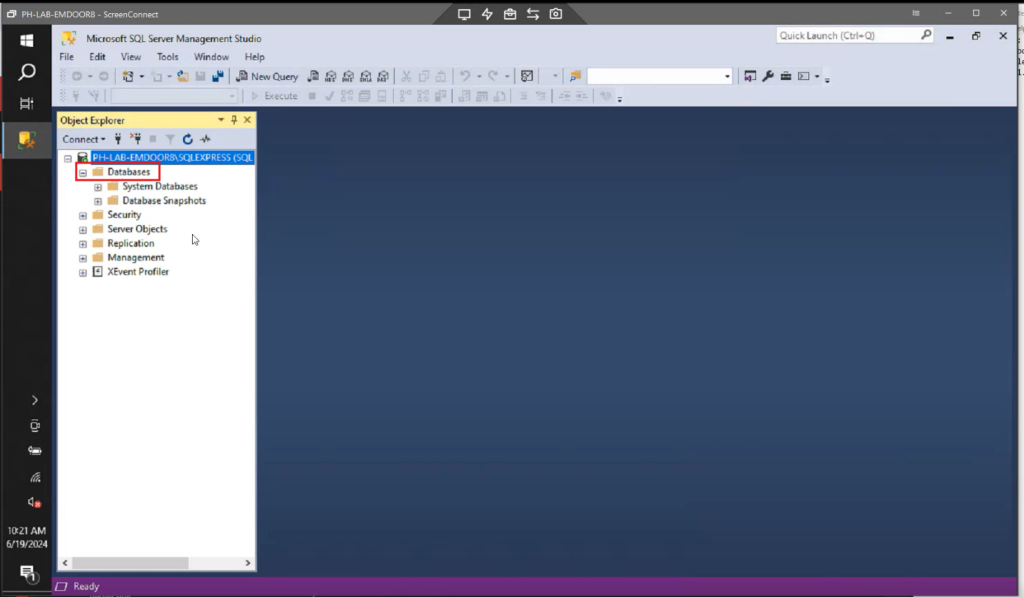
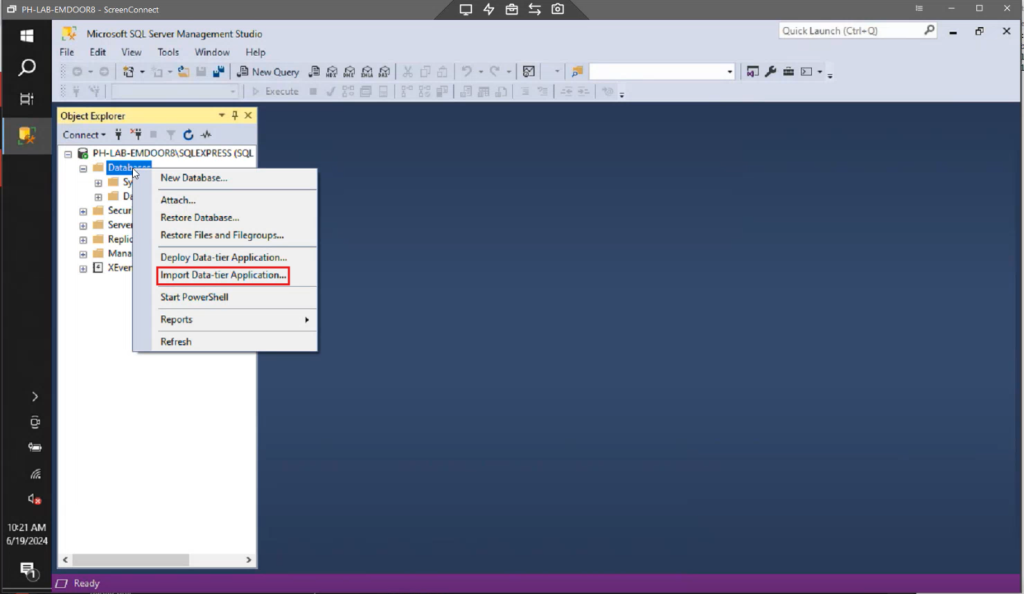
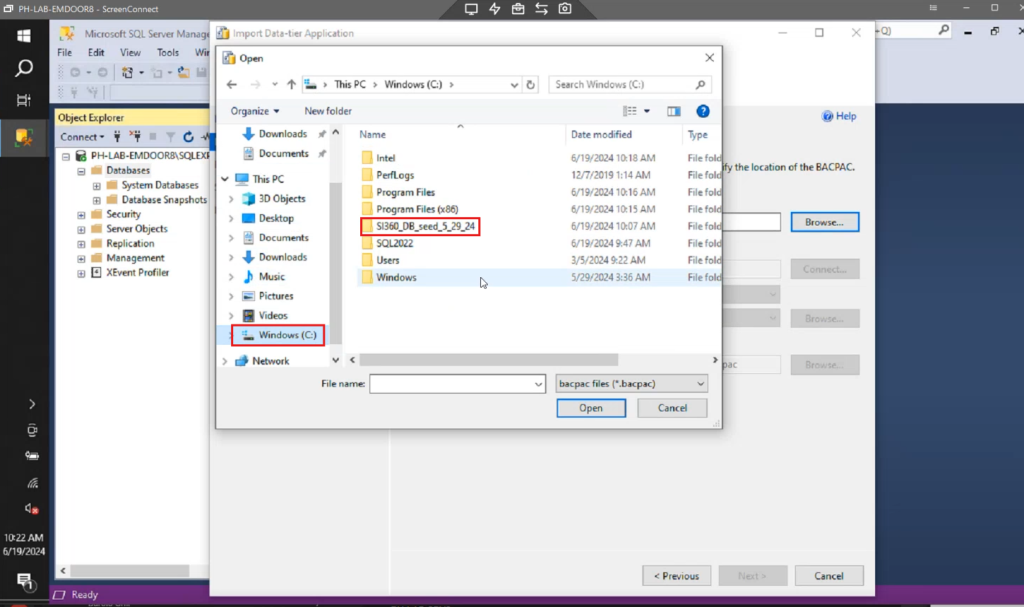
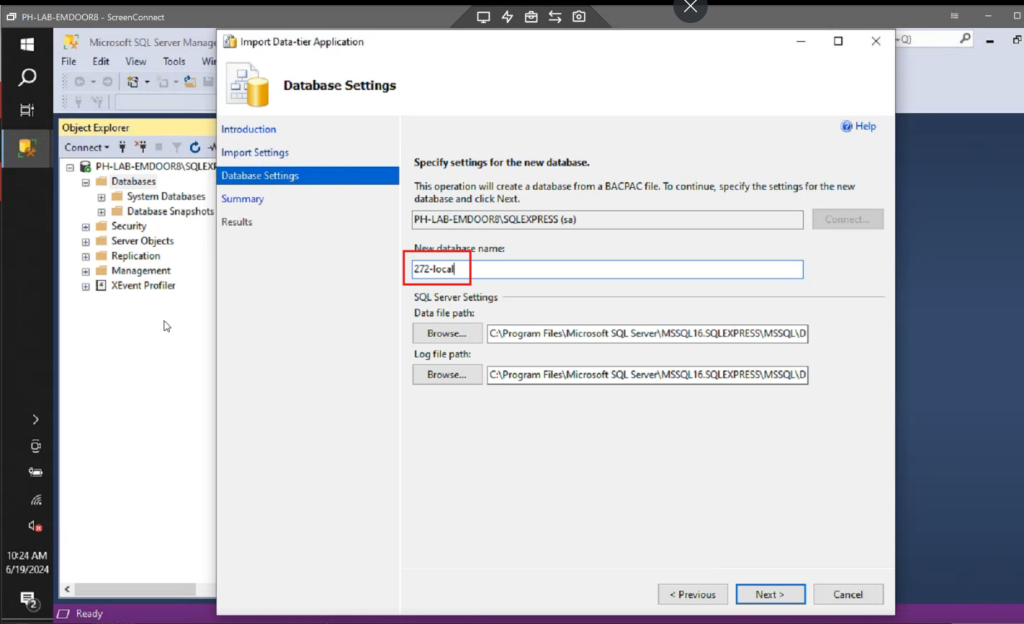
5. Right-click on the Databases folder and select Import Data-tier Application.
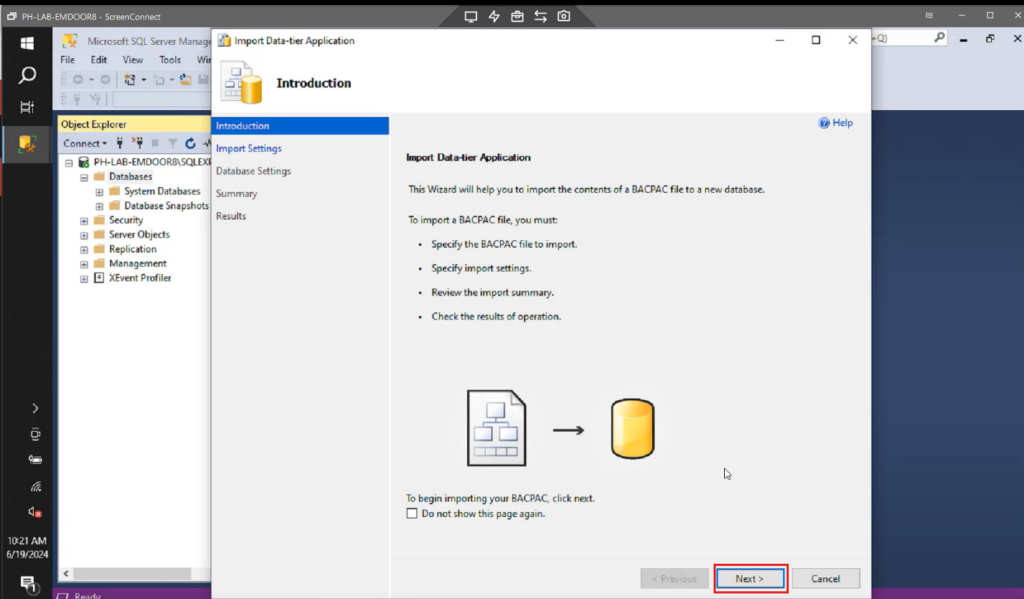
Importing the Database
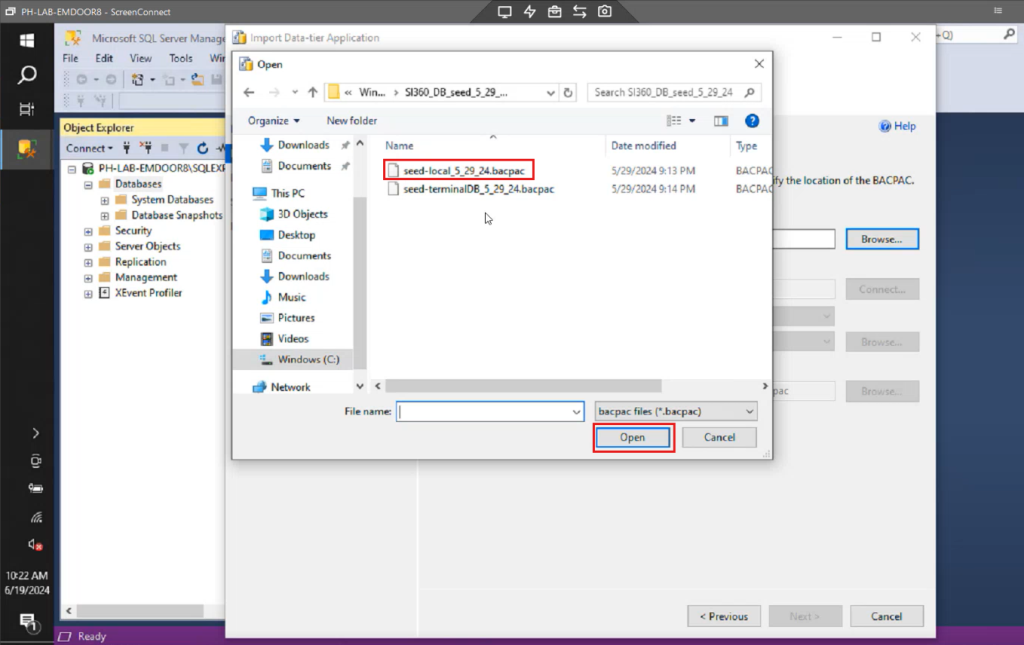
1. Click Next, then Browse.
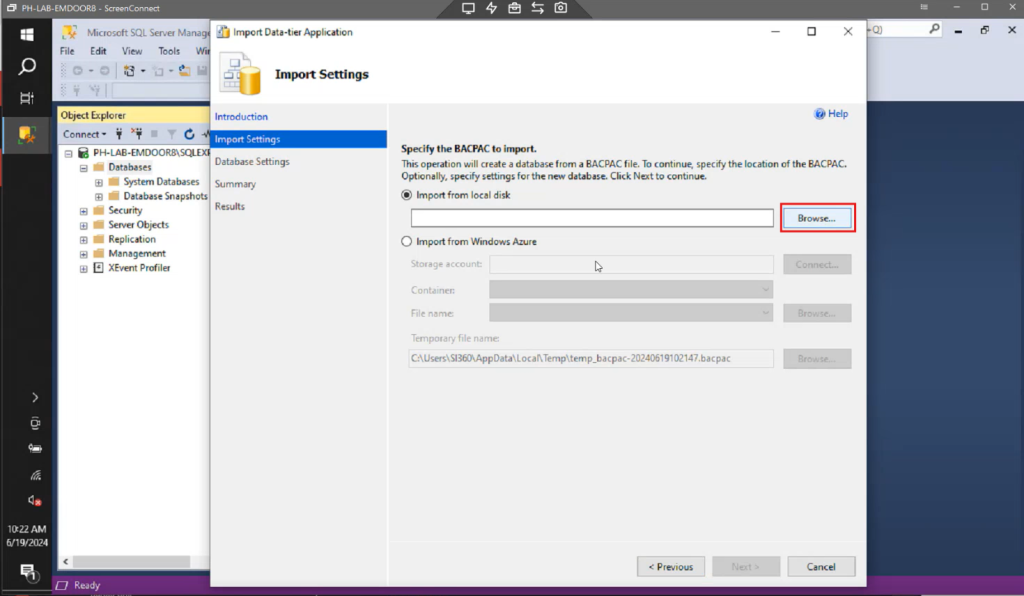
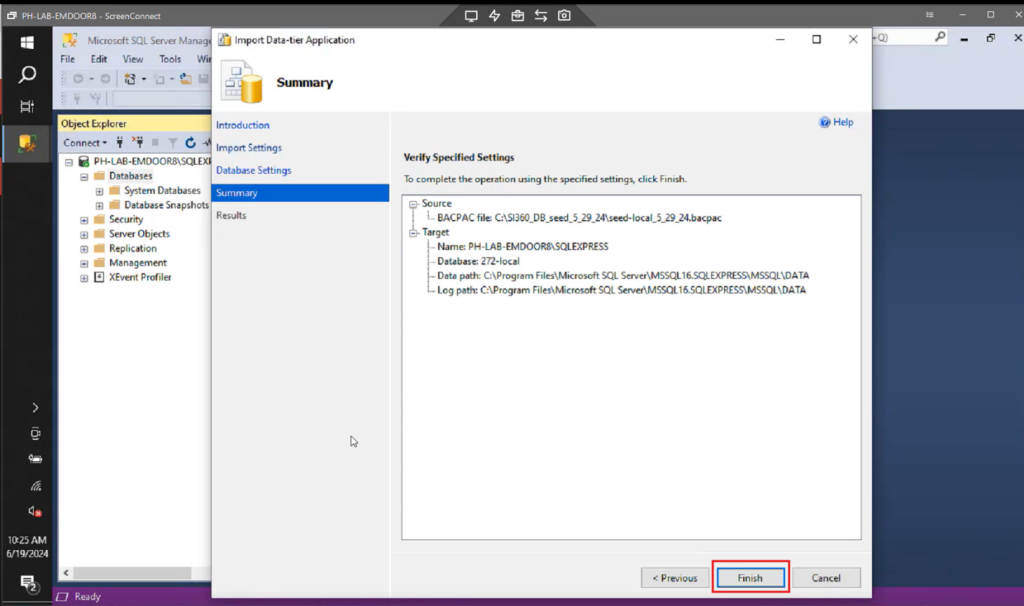
2. Navigate to the Windows C: drive and select SI360 Database seed file (seed-local_5_29_24.bacpac).
3. Click Next, then Finish.
Important Notes
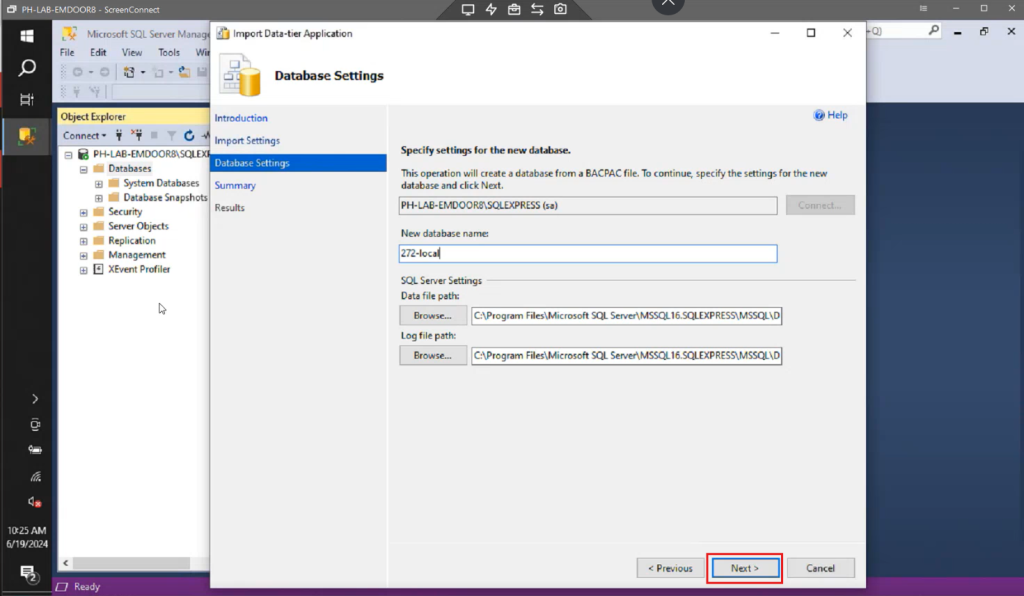
- For SI360, the site name is no longer applicable as the database name. Use the site ID instead.
- Each partner using SI360 will be given a specific site ID number (e.g., 272-local where 272 is the site ID).
- All terminals need a local database to function without the server. Basic functionalities remain operational.
- The server requires both the site database and the local database.
Verification
- The import process may take 2-3 minutes to complete. Ensure the summary results are all successful.
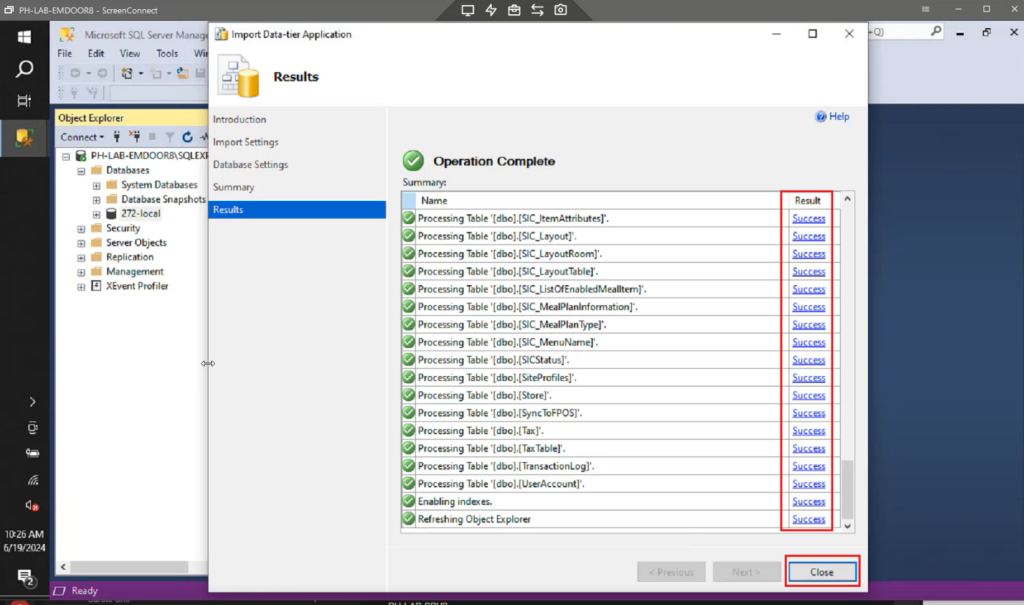
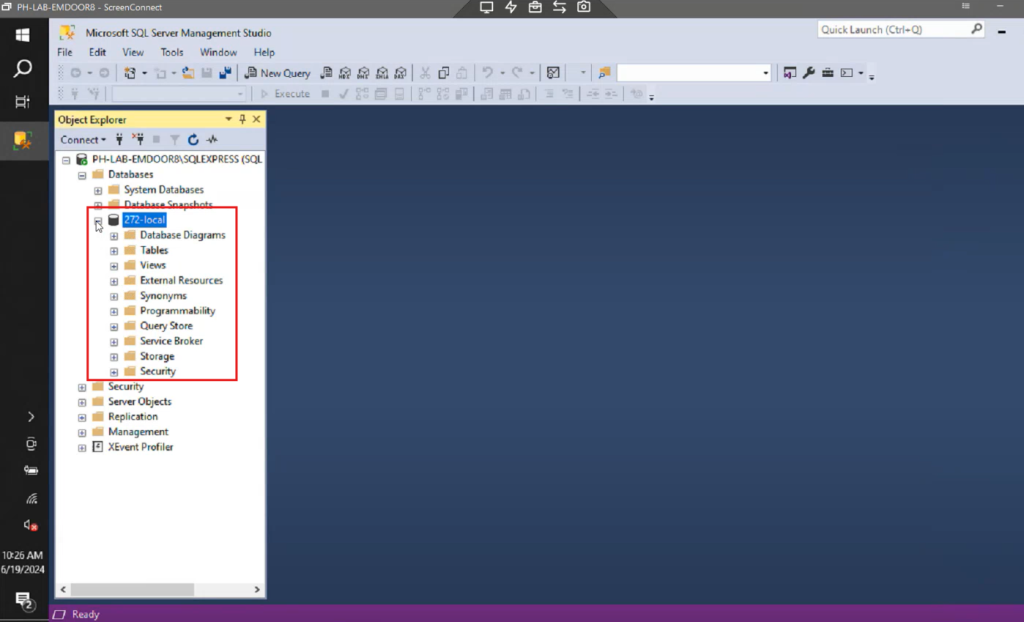
- Verify the local database creation on the left side of the Management Studio.
If you encounter any issues during the process, refer back to the specific section for troubleshooting or consult with support.